
Table of Contents
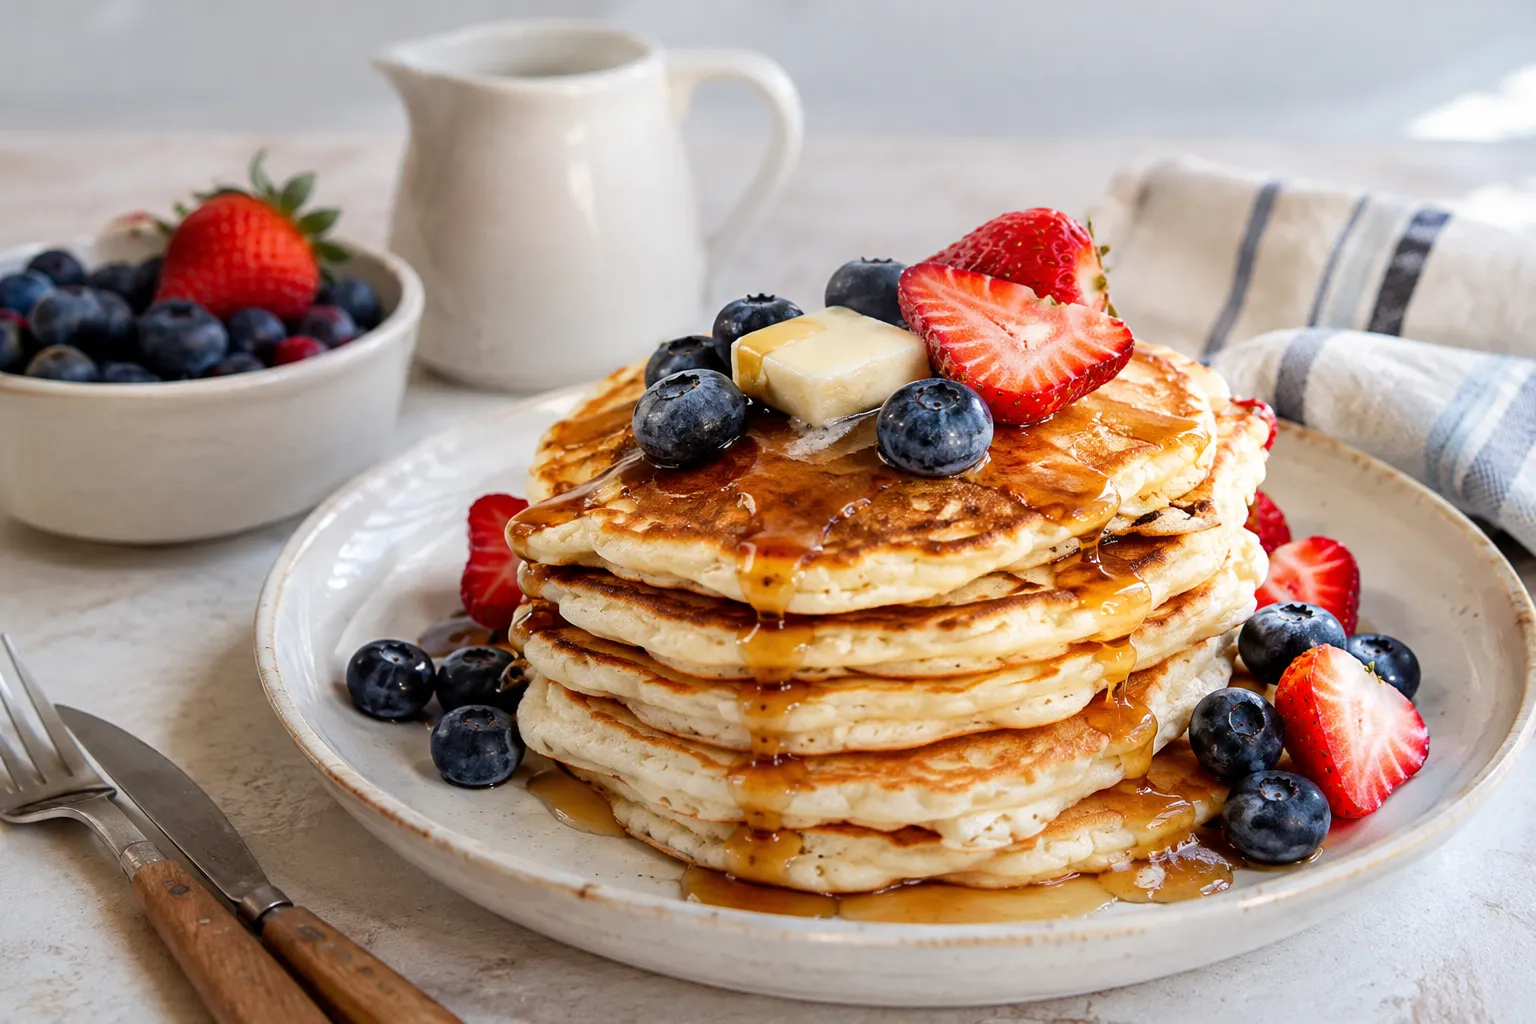
Imagine cutting into a tall stack of golden pancakes with crisp edges, a soft, fluffy center, and a delicate buttery flavor. Now imagine enjoying every bite without worrying about gluten, gritty flour, or pancakes that turn into rubbery discs the moment they cool.
That is exactly what this gluten free pancake recipe is designed to deliver.
Whether you’re new to gluten-free baking, cooking for someone with celiac disease, or simply exploring delicious alternatives to traditional breakfast favorites, the secret lies in understanding how gluten-free flours, eggs, moisture, and leavening agents work together.
This comprehensive guide goes beyond a basic pancake recipe. You’ll learn a reliable master formula, five flour variations, the science behind fluffy pancakes, practical troubleshooting techniques, and make-ahead strategies that turn breakfast into an effortless pleasure.
And because great food doesn’t stop at breakfast, these pancakes can easily become part of your collection of favorite gluten free desserts, too.
Let’s get cooking!
1. The Universal Golden Ratio: Your Foolproof Gluten Free Pancake Recipe
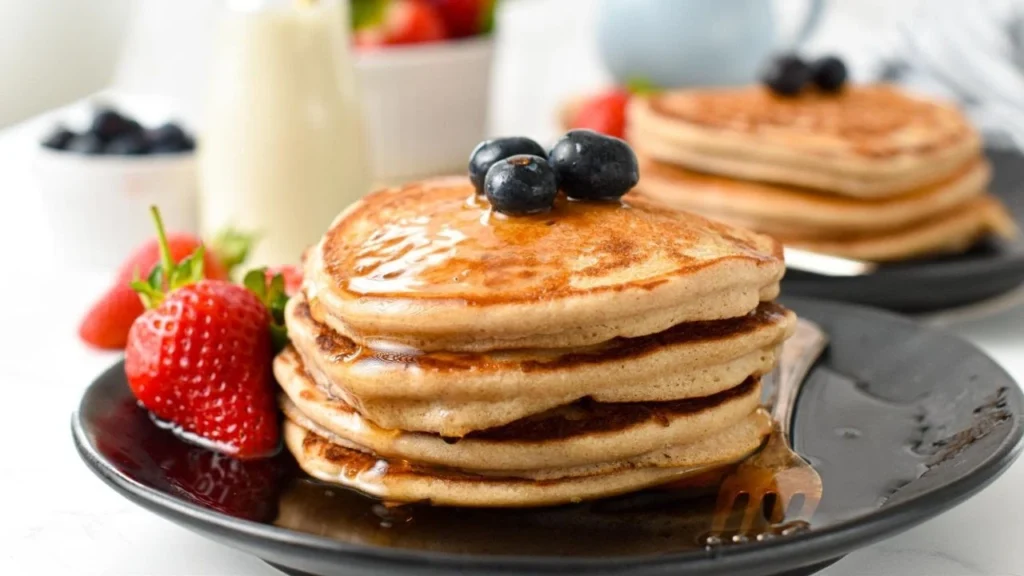
The goal: golden edges, a tender crumb, and a soft, airy middle.
How do you make gluten free pancakes fluffy?
The secret to fluffy gluten free pancakes is balancing structure, moisture, and lift. Use a quality gluten-free flour blend, add a little almond flour for tenderness and tapioca starch for a lighter texture, combine baking powder with an appropriate acid-activated amount of baking soda, and rest the batter for 10 minutes before cooking. Cook over medium-low heat so the centers set without burning the outside.
The golden rules at a glance
- Balanced flour: Combine structure-building flour with moisture-retaining ingredients.
- Fresh leavening: Baking powder and baking soda help produce a light, airy crumb.
- Proper hydration: Allow the batter to rest for 10 minutes.
- Gentle mixing: Stir only until the ingredients come together.
- Controlled heat: Aim for a griddle temperature of 325–350°F (163–177°C).
The master gluten free pancake formula
The following table provides a starting point for different flour combinations. These are practical recipe-development guidelines rather than interchangeable formulas: each flour absorbs liquid differently, so use the corresponding recipe and adjust consistency as needed.
| Flour pathway | Flour quantity | Starting liquid quantity | Binder guidance |
|---|---|---|---|
| Classic 1:1 blend | 150 g blend | 240 ml buttermilk | Eggs; follow blend instructions |
| Flour trio | 120 g GF blend + 30 g almond flour + 20 g tapioca starch | 270 ml buttermilk | Eggs; xanthan gum if needed |
| Oat and sweet rice | 100 g oat flour + 50 g sweet rice flour | 240–270 ml milk | Eggs |
| Almond flour | 150 g blanched almond flour | 180–210 ml milk | Higher egg ratio |
| Cassava flour | 120 g cassava flour | 240–300 ml milk | Eggs; adjust gradually |
Liquid quantities are starting estimates, not guaranteed equivalents. For the most reliable results, use the detailed recipes and consistency cues below.
The easiest place to begin is with a commercial 1:1 gluten-free baking blend. Once you understand how that batter behaves, experimenting with oats, almond flour, buckwheat, or cassava becomes much simpler.
2. The Science of Fluffy Gluten Free Pancakes
Understanding why pancakes turn out fluffy makes it easier to reproduce great results. Traditional wheat flour contains gluten-forming proteins that create an elastic network. Gluten-free ingredients don’t provide that same network, so we need to build structure in other ways.
2.1. Flour mechanics: Why single flours often fail
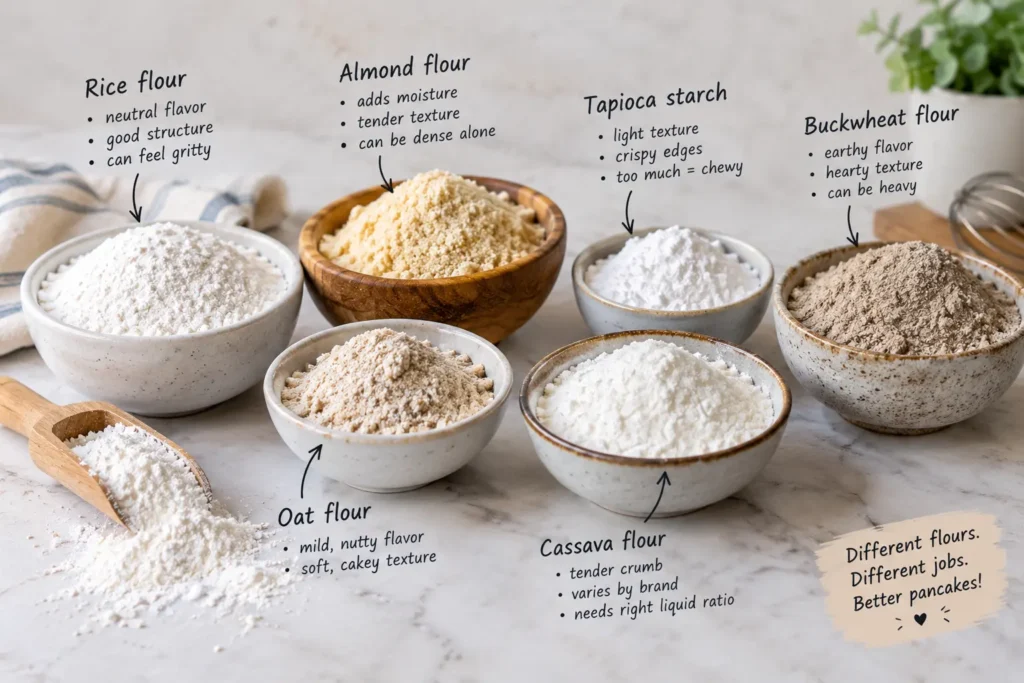
Different gluten-free flours perform different jobs.
- Rice flour provides a neutral flavor and structure, but can feel gritty if the batter doesn’t have enough hydration time.
- Almond flour contributes fat, moisture, and tenderness. Used alone, it can produce fragile, dense pancakes because it lacks the starch structure found in many baking flours.
- Tapioca starch adds flexibility and can help create pleasantly crisp edges, although too much may make the center chewy.
- Oat flour delivers a mild, slightly nutty flavor and a soft, cakey texture.
- Buckwheat flour has an earthy flavor and provides substance, but can produce heavy pancakes if used without lighter ingredients.
- Cassava flour can produce a tender crumb, but its liquid requirements vary by brand and formulation.
The solution is to think of flour as a team rather than a single ingredient.
A balanced gluten free pancake recipe uses one ingredient for structure, another for tenderness, and sometimes a starch for texture. A commercial blend may already contain several flours, starches, and xanthan gum, so additional ingredients should be chosen carefully.
2.2. Chemical leavening: The double-rise mechanism
Pancake fluffiness depends heavily on carbon dioxide, the gas that forms bubbles in the batter.
Baking powder contains ingredients that react with moisture and, in many formulations, heat. Baking soda is alkaline and produces carbon dioxide when it reacts with an appropriate acid.
When your batter contains buttermilk, lemon juice, or apple cider vinegar, baking soda can help produce an initial burst of gas. Baking powder supplies additional lift as the pancakes cook.
This combination can create a lighter texture, but the proportions matter. Too much baking soda may leave an unpleasant, soapy taste and cause excessive browning.
For the master recipe, use both leaveners in measured amounts rather than adding extra in the hope of creating more height.
2.3. Egg mechanics: Whole eggs versus separated eggs
Eggs play several roles in gluten free baking. Their proteins help set the pancake structure, while the yolks contribute fat and emulsifiers that improve tenderness.
For extra-fluffy pancakes, separating the eggs is a useful technique.
Whisk the yolks into the wet ingredients as usual. Beat the whites separately until foamy or at soft peaks, then gently fold them into the batter at the end.
This introduces additional air into the mixture. As the pancakes cook, the egg proteins set around the expanding bubbles, helping preserve the airy interior.
You don’t have to whip the whites every time. Whole eggs are convenient and work well for everyday pancakes. Save the separation technique for weekends, brunch gatherings, or occasions when you want a particularly light stack.
3. The Master Gluten Free Pancake Recipe
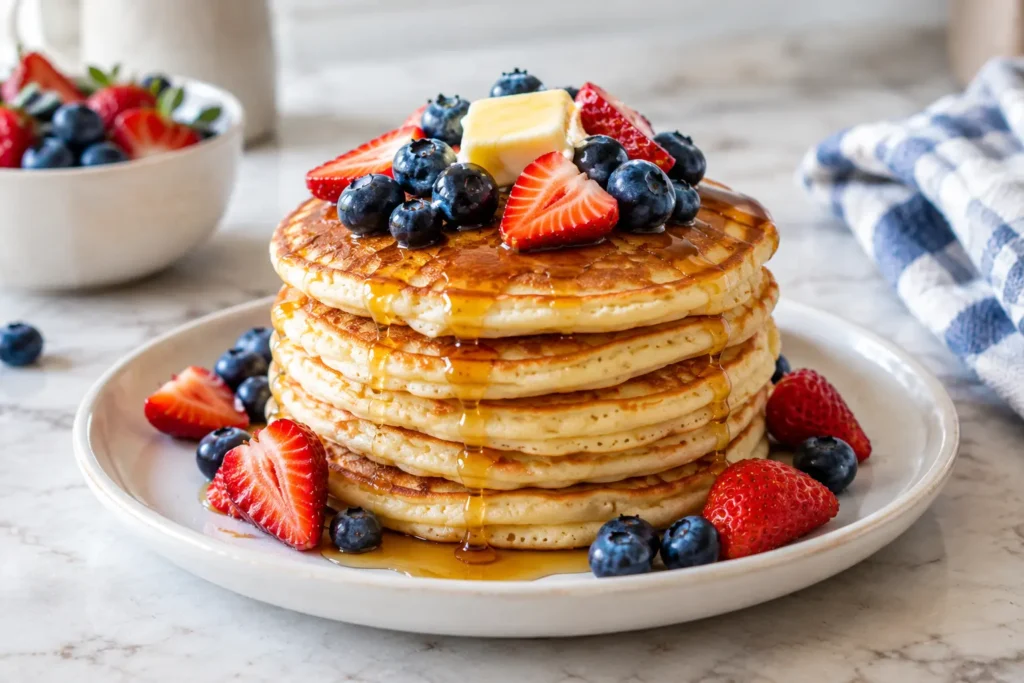
This is the core recipe to master before exploring the variations. It combines a gluten-free flour blend, almond flour, and tapioca starch for a tender interior and lightly crisp edges.
Use a digital scale when possible. Volume measurements are approximate because flour density varies.
Dry ingredients
- 120 g (approximately 1 cup) gluten-free 1:1 baking flour blend
- 30 g (approximately ⅓ cup) superfine blanched almond flour
- 20 g (approximately 2½ tablespoons) tapioca starch
- 25 g (2 tablespoons) granulated sugar or coconut sugar
- 8 g (2 teaspoons) baking powder
- 2 g (½ teaspoon) baking soda
- ¼ teaspoon fine sea salt
- ¼ teaspoon ground cinnamon, optional
Wet ingredients
- 270 ml (1 cup plus 2 tablespoons) buttermilk
- 2 large eggs, separated
- 30 g (2 tablespoons) unsalted butter, melted and cooled, or neutral oil
- 1 teaspoon pure vanilla extract
Step-by-step instructions
Step 1: Prepare the dry ingredients.
In a large bowl, whisk together the gluten-free flour, almond flour, tapioca starch, sugar, baking powder, baking soda, salt, and optional cinnamon.
Whisking distributes the leaveners evenly, helping prevent pockets of bitterness and ensuring a consistent rise.
Step 2: Combine the wet ingredients.
In another bowl, whisk the egg yolks with the buttermilk, melted butter, and vanilla extract until smooth.
If the melted butter is hot, let it cool first. Hot butter can partially cook the eggs before the batter reaches the pan.
Step 3: Mix gently.
Pour the wet mixture into the dry ingredients. Stir with a spatula or whisk just until the flour is moistened.
A few small lumps are fine. Avoid vigorous beating because excessive mixing can make some gluten-free batters dense or gummy.
Step 4: Rest the batter for 10 minutes.
Leave the batter at room temperature for 10 minutes. This gives the flour and starches time to absorb moisture, which helps reduce grittiness and produces a more consistent texture.
Meanwhile, preheat your griddle or skillet.
Step 5: Whip and fold in the egg whites.
Beat the egg whites until foamy or until they reach soft peaks. Gently fold them into the rested batter using a spatula.
Use slow movements from the bottom of the bowl upward. You want to retain as much air as possible without leaving large streaks of egg white.
Step 6: Heat the pan.
Set a nonstick skillet, cast-iron pan, or electric griddle to medium-low heat, aiming for 325–350°F (163–177°C) on a temperature-controlled surface.
Lightly grease the cooking surface with butter or oil. If the pan is too hot, the outside may brown before the middle cooks.
Step 7: Pour and cook.
Scoop approximately ¼ cup of batter for each pancake. Leave enough space between pancakes for easy flipping.
Cook for about 2–3 minutes on the first side. Look for bubbles forming across the surface and edges that begin to look dull and set.
Step 8: Flip once.
Slide a thin, wide spatula underneath the pancake and flip gently. Cook for another 1–2 minutes, or until the center is fully cooked.
Resist the urge to press down on the pancake. Pressing forces out air and can leave the finished texture flat.
Step 9: Serve warm.
Transfer the pancakes to a plate and serve with maple syrup, fresh berries, sliced bananas, or a little butter.
For a whole stack, keep finished pancakes warm on a wire rack in a 200°F (about 95°C) oven while you cook the remaining batter.
4. Choose Your Pathway: Five Gluten-Free Flour Variations
One of the best things about gluten-free cooking is discovering how different flours change the flavor and texture of the same breakfast staple. These variations give you flexibility when you run out of ingredients or want to experiment with different dietary preferences.
Pathway 1: Classic 1:1 gluten-free flour blend
Beginner-friendly
This is the simplest option for weekday breakfasts. Use 150 g gluten-free 1:1 flour blend, 240 ml buttermilk, 2 eggs, 25 g sugar, 8 g baking powder, 1 tablespoon melted butter, and vanilla. Add a little baking soda if your buttermilk is sufficiently acidic, adjusting for your chosen recipe.
Texture: Soft, familiar, and easy to customize.
Best for: Beginners, busy mornings, and traditional pancake toppings.
Tip: Check whether the flour blend already contains xanthan gum. If it does, you generally don’t need to add more.
Pathway 2: Oat flour and sweet rice flour
Soft and cakey
Combine 100 g certified gluten-free oat flour with 50 g sweet rice flour. Begin with 240 ml buttermilk, 2 eggs, 8 g baking powder, a little sugar, and vanilla. Add extra liquid gradually if the batter becomes too thick.
Texture: Tender, slightly chewy, and pleasantly hearty.
Best for: People who enjoy whole-grain flavor without the heaviness of an all-buckwheat pancake.
Tip: Use certified gluten-free oats when gluten avoidance is medically necessary. Oat tolerance can vary among individuals with celiac disease, so follow your clinician’s guidance.
Pathway 3: Almond flour pancakes
Grain-free
Whisk 150 g superfine blanched almond flour with 2 eggs, 120–150 ml milk, 1 teaspoon baking powder, a pinch of salt, vanilla, and 1 tablespoon sweetener. Let the batter stand for 5 minutes and add milk if needed.
Texture: Moist, delicate, and slightly rich.
Best for: Grain-free menus and almond lovers.
Tip: Cook smaller pancakes over lower heat. Almond flour pancakes are fragile before the egg proteins set, so flip only when the underside is golden and the edges are stable.
Important: Almond flour contains tree nuts and is not appropriate for people with almond allergies.
Pathway 4: Cassava flour pancakes
Grain-free and nut-free
Start with 120 g cassava flour, 2 eggs, 240 ml milk, 8 g baking powder, 1 tablespoon sugar, a pinch of salt, and vanilla. Rest the batter for 5–10 minutes before deciding whether to add more liquid.
Texture: Tender and substantial, with a mild flavor.
Best for: People avoiding both grains and tree nuts, provided all other ingredients are suitable.
Tip: Cassava flour absorbs liquid differently across brands. Measure by weight and add milk in small increments until the batter flows slowly from a spoon.
Important: Cassava flour is not the same as tapioca starch. They come from the same plant but behave differently in recipes.
Pathway 5: Buckwheat and tapioca blend
Earthy and flavorful
Combine 75 g buckwheat flour with 75 g tapioca starch, 2 eggs, approximately 250 ml buttermilk, 8 g baking powder, sugar, salt, and vanilla. Rest for 10 minutes, adjusting the liquid for a pourable consistency.
Texture: Airy enough for breakfast, with a pleasantly chewy bite.
Best for: People who enjoy deeper, nuttier flavors or want pancakes that work with both sweet and savory toppings.
Tip: Buckwheat is naturally gluten-free despite its name, but cross-contact during production is possible. Choose a product labeled gluten-free when needed.
5. Cooking Technique: Six Golden Rules for Better Pancakes
Even the right ingredients won’t rescue a poorly controlled cooking process. Use these practical rules whenever you prepare a new gluten free pancake recipe.
Rule 1: Measure flour accurately
A digital kitchen scale is the most reliable option. Scooping flour directly from a bag can pack extra flour into a measuring cup, resulting in dry, thick batter.
If you don’t have a scale, fluff the flour, spoon it into the measuring cup, and level the top without pressing it down.
Rule 2: Mix wet and dry ingredients separately
This prevents concentrated pockets of baking powder or salt and makes it easier to combine everything with minimal stirring.
Once the wet ingredients meet the dry, stir just until combined. Don’t try to eliminate every lump.
Rule 3: Respect the hydration rest
A 10-minute rest gives rice flour, oat flour, and starches time to absorb liquid. It can also improve the consistency of the batter, making it easier to portion and flip.
Because baking powder begins reacting after hydration, avoid leaving the batter for an unnecessarily long time. For the fluffiest results, cook it soon after the resting period.
Rule 4: Control your pan temperature
Medium-low heat is usually more forgiving than high heat. A temperature-controlled griddle set to 325–350°F is a useful starting point, although actual surface temperature can fluctuate.
Without a thermometer, sprinkle a few drops of water onto the pan. They should sizzle gently rather than evaporate violently. If the first pancake darkens before bubbles form, lower the heat.
Rule 5: Use the right portion size and flipping cues
A ¼-cup measure creates pancakes that are easy to cook evenly. Wait for bubbles, dull edges, and a stable underside before flipping.
Gluten-free pancakes can be more delicate than wheat pancakes, especially before their starches and egg proteins set. A broad spatula helps support the pancake during the turn.
Rule 6: Keep finished pancakes from getting soggy
Place cooked pancakes in a single layer on a wire rack in a low oven, around 200°F (95°C). Stacking them immediately traps steam between the layers and softens the edges.
If you need to stack them, wait until the pancakes have cooled slightly or use a loose arrangement that allows steam to escape.
6. Troubleshooting Guide: Fix Common Gluten-Free Pancake Problems
A disappointing batch doesn’t mean gluten-free pancakes are difficult. Usually, a small adjustment to heat, hydration, or mixing is all that’s needed.
Problem: Gummy or raw centers
Likely causes: The pan is too hot, pancakes are too thick, or the batter has excessive moisture.
Solution: Reduce the heat, make smaller pancakes, and cook longer. Check that your baking powder is fresh and let the center set before removing the pancake. If the outside browns quickly, the pan temperature is probably too high.
Problem: Pancakes fall apart when flipped
Likely causes: The underside hasn’t set, there isn’t enough binding, or the batter is too wet.
Solution: Wait until the edges appear dry and the underside is golden. Use a wider spatula and avoid moving the pancake too early. If the recipe uses a flour blend without a binder, consider a blend containing xanthan gum or follow the manufacturer’s recommended binder amount.
Problem: Pancakes are gritty
Likely causes: Rice-based flour hasn’t absorbed enough liquid or the batter was cooked immediately.
Solution: Rest the batter for 10–15 minutes. If the batter becomes excessively thick, add milk one tablespoon at a time. Fine-textured flour blends can also improve the finished result.
Problem: Pancakes are dry, rubbery, or dense
Likely causes: Too much flour, overmixing, insufficient fat, or too little leavening.
Solution: Weigh your ingredients, leave small lumps in the batter, and use fresh leaveners. If the pancakes feel dry, check whether your flour blend requires additional liquid or whether you accidentally used a more absorbent flour.
Problem: Dark outside, uncooked inside
Likely cause: Excessive pan heat.
Solution: Lower the heat and give the pancakes more time. Smaller portions also cook more evenly. Avoid increasing the temperature just to speed up breakfast.
A helpful diagnostic rule is to change one variable at a time. If you simultaneously change the flour, milk, leavening, and pan temperature, you’ll have difficulty identifying what actually improved the result.
7. Dietary and Allergen Substitution Guide
A good gluten-free breakfast should be flexible enough for different dietary needs. The key is knowing which substitutions affect flavor only and which ones change the recipe’s structure.
| Dietary requirement | Suggested substitution | What to expect |
|---|---|---|
| Dairy-free | Unsweetened plant milk and dairy-free butter or oil | Slight flavor and browning changes |
| Egg-free | Commercial egg replacer or flax eggs | Usually less airy and more delicate |
| Vegan | Plant milk, oil, and egg replacement | May require gentler flipping |
| Lower added sugar | Reduce sugar or use a suitable sweetener | Less browning and slightly different texture |
| Lower-FODMAP ingredients | Lactose-free milk or suitable alternatives; check every ingredient | Individual tolerance and serving size matter |
| Nut-free | A suitable 1:1 blend or oat-based recipe without nut ingredients | Check labels for cross-contact |
Dairy-free pancakes
Replace buttermilk with 270 ml unsweetened soy milk or another suitable plant milk, plus 1 tablespoon apple cider vinegar or lemon juice. Let the mixture stand for approximately 5 minutes before using it.
Use melted coconut oil or neutral avocado oil in place of butter. Soy milk generally provides more protein than many other plant milks, while coconut milk may add a more noticeable flavor.
If you have a tree-nut allergy, avoid almond milk and check all ingredient labels.
Egg-free and vegan pancakes
For a basic egg replacement, mix 1 tablespoon ground flaxseed with 3 tablespoons water per egg and allow it to thicken for approximately 5–10 minutes.
For two eggs, use two flax eggs. However, flax eggs don’t create the same foam as whipped egg whites, so the pancakes may be denser and more fragile.
Commercial egg replacers designed for baking can also work. Follow the product instructions and consider a small test batch before making breakfast for a crowd.
You can try adding an extra ½ teaspoon of baking powder for additional lift, but results depend on the flour blend and the replacement used. Adding more leavener is not a guaranteed fix for missing egg structure.
Lower-sugar and sugar-free options
You can reduce the sugar in the master recipe or use a baking-compatible sweetener, such as an appropriate monk fruit or erythritol blend.
Remember that sugar contributes more than sweetness: it also helps with browning, moisture retention, and flavor. Pancakes made without sugar may look paler, even when fully cooked.
Gluten-free does not automatically mean safe for celiac disease
If you’re cooking for someone with celiac disease, verify that flour, oats, baking powder, flavorings, and other packaged ingredients are labeled appropriately. Prevent cross-contact by using clean utensils, bowls, cooking surfaces, and a clean griddle.
A shared toaster or a pan contaminated with wheat-based batter can compromise an otherwise gluten-free meal. Dietary requirements should guide ingredient choices and kitchen preparation, not just the flour selection.
8. Storage, Freezing, and Reheating Playbook
One of the biggest advantages of homemade pancakes is how well they work for meal preparation. A little planning means you can enjoy a quick breakfast on busy mornings without sacrificing texture.
Refrigerating leftover pancakes
Allow pancakes to cool until they stop releasing substantial steam, then transfer them to an airtight container. Refrigerate promptly and consume within 3–4 days for a conservative food-safety approach.
If your pancakes contain perishable toppings, such as fresh cream or custard, store those separately and follow the appropriate storage guidance.
Freezing pancakes without sticking
The best way to freeze pancakes is to freeze them individually first.
- Let the pancakes cool completely.
- Arrange them in a single layer on a parchment-lined baking sheet.
- Freeze for approximately 1–2 hours, until firm.
- Transfer them to a freezer-safe bag or container, using parchment between layers if needed.
- Label with the date and store at 0°F (-18°C) or below.
For best texture, use frozen pancakes within 2–3 months. They may remain safe longer when continuously frozen, but quality can deteriorate over time.
Reheating methods
Toaster: Best for crisp edges
Reheat frozen pancakes directly in the toaster if their size and thickness are suitable for your appliance. Use a moderate setting and repeat briefly if needed. Never force oversized pancakes into toaster slots.
Oven or air fryer: Best for several servings
Warm pancakes at 325–350°F (163–177°C) for approximately 5–10 minutes, depending on thickness and whether they’re refrigerated or frozen. Check that the centers are thoroughly heated.
Microwave: Best for speed
Microwave one or two pancakes for 20–45 seconds, depending on their thickness and starting temperature. Add short intervals if necessary. Avoid overheating, which can make starch-based pancakes chewy.
9. Creative Toppings: From Breakfast to Gluten Free Desserts
Pancakes don’t have to be limited to maple syrup. With the right toppings, the same master recipe can become a brunch centerpiece or a simple dessert.
Here are a few delicious combinations to try:
- Berry breakfast stack: Fresh blueberries, strawberries, maple syrup, and plain yogurt.
- Chocolate banana pancakes: Banana slices, gluten-free chocolate chips, and a drizzle of melted chocolate.
- Apple cinnamon pancakes: Warm cinnamon apples, a pinch of nutmeg, and maple syrup.
- Lemon and berry stack: Lemon zest, fresh raspberries, and a little powdered sugar.
- Peanut butter pancakes: A thin drizzle of peanut butter with banana slices, provided peanuts are suitable for your dietary needs.
- Tropical pancakes: Fresh mango, coconut flakes, and a little lime zest.
For a dessert-style serving, stack smaller pancakes, layer them with sweetened yogurt or a suitable cream alternative, and top with berries. You can also serve them with fruit compote or a spoonful of gluten-free chocolate sauce.
These combinations demonstrate how a reliable gluten free pancake recipe can serve as the foundation for many different meals. When selecting packaged toppings, remember that gluten-free pancakes can still be contaminated by sauces, chocolate products, or other ingredients that contain gluten.
10. Frequently Asked Questions About Gluten-Free Pancakes
These quick answers address the most common questions about ingredients, texture, preparation, and substitutions.
What is the best gluten-free flour for fluffy pancakes?
A 1:1 gluten-free baking flour blend containing xanthan gum is a convenient starting point. Combining it with a small amount of almond flour and tapioca starch can improve tenderness and texture. Oat, cassava, and buckwheat flour can also work well when the liquid and binder ratios are adjusted to suit their properties.
Why are my gluten-free pancakes gummy in the middle?
Gummy centers commonly result from cooking over excessively high heat, using too much liquid, or removing pancakes before their centers have set. Lower the heat, make smaller pancakes, and cook for approximately 2–3 minutes on the first side and 1–2 minutes on the second, adjusting as needed.
Do I need xanthan gum for gluten-free pancakes?
Not always. Many commercial gluten-free flour blends already contain xanthan gum or another binder. If your blend contains no binder, a small amount may improve cohesion. Recipes based on almond flour or eggs may behave differently, so follow the specific recipe rather than automatically adding xanthan gum to every batter.
How long should gluten-free pancake batter rest before cooking?
A 10-minute rest is a useful starting point for most gluten-free pancake batters. This allows the flour and starches to absorb moisture and can reduce grittiness. Some recipes benefit from a shorter or slightly longer rest, depending on the flour used.
Can you make gluten-free pancakes without eggs?
Yes. Flax eggs, commercial egg replacers, and aquafaba are possible alternatives. Two flax eggs can replace two large eggs in some recipes, although the pancakes may be less airy and more delicate. Make a small test batch when working with a new flour blend or egg substitute.
Can I make this gluten free pancake recipe dairy-free?
Yes. Replace buttermilk with an unsweetened plant milk mixed with 1 tablespoon apple cider vinegar or lemon juice. Replace butter with a suitable plant-based alternative or neutral oil. Soy milk can provide more protein than many other plant milks, while other options may change the flavor and texture.
Why are my pancakes not rising?
Check that your baking powder is fresh, that the ingredients are measured accurately, and that the pan isn’t excessively hot. Overmixing, very thin batter, or an imbalance of leavening agents can also affect the rise. If using whipped egg whites, fold them in gently immediately before cooking.
Are gluten-free pancakes healthier than regular pancakes?
Not automatically. Gluten-free pancakes can provide a suitable alternative for people who need to avoid gluten, but their nutritional value depends on the ingredients, serving size, and toppings. Almond flour, oat flour, and different starch blends have different nutritional profiles. Gluten-free is a dietary characteristic, not a guarantee of lower calories or higher nutritional value.
Can I prepare the batter the night before?
For the fluffiest pancakes, it’s generally better to mix the batter shortly before cooking. Baking powder begins reacting when hydrated, and an overnight rest can reduce the amount of lift remaining by morning. You can measure the dry ingredients in advance, refrigerate the wet ingredients separately, and combine them when you’re ready to cook.
Can I use this recipe for waffles?
Not without adjustments. Waffle batter often needs a different fat ratio and consistency to achieve crisp edges and a sturdy structure. A pancake recipe can be a starting point, but follow a waffle-specific formula for more predictable results.
Final Thoughts: Your New Go-To Gluten-Free Pancake Recipe
Making fluffy gluten-free pancakes doesn’t require complicated ingredients or professional baking equipment. It requires understanding how flour, moisture, eggs, and leavening work together.
Start with the master recipe, measure your flour by weight, rest the batter, and cook over moderate heat. Once you’ve mastered those fundamentals, experiment with oat flour, almond flour, cassava, or buckwheat to discover your favorite texture and flavor.
Most importantly, don’t expect perfection from every first attempt. Different gluten-free flour blends absorb liquid differently, and even a change in pan temperature can influence the finished stack. Pay attention to the batter, make small adjustments, and keep track of the combinations that work for you.
Before long, you’ll have a dependable recipe for weekend brunch, quick weekday breakfasts, and even creative gluten free desserts.
Ready to make your first batch? Grab your favorite mixing bowl, preheat the skillet, and enjoy a stack of golden, fluffy pancakes made exactly the way you like them.