
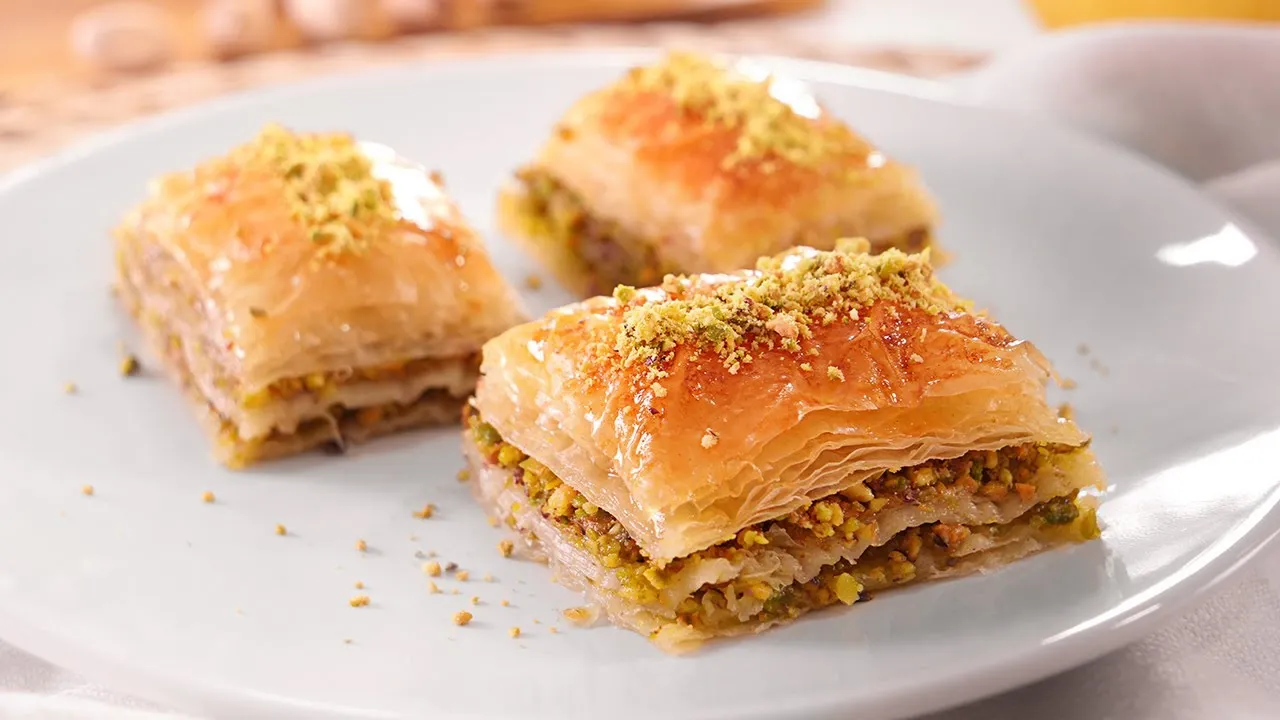
Table of Contents
Gluten Free Phyllo Dough: 7 Easy Tips for Perfect Results
Working with gluten free phyllo dough requires a different kitchen strategy. Traditional wheat pastry uses protein to stretch into paper-thin sheets without tearing. Because this alternative lacks natural elasticity, handle the ingredients carefully for signature crunch.
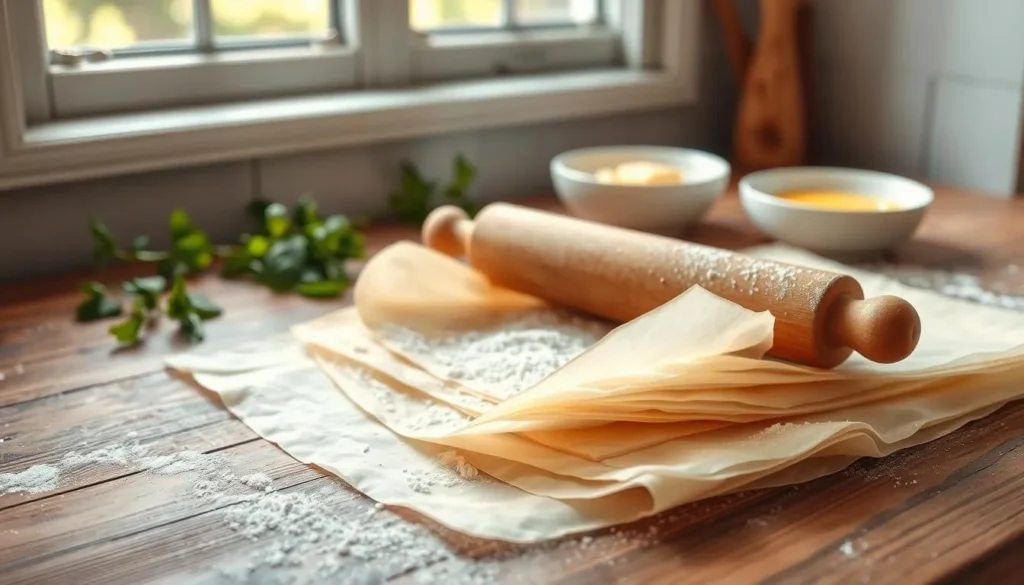
You can master this delicate process by controlling moisture and moving with care. Success comes down to precision, from weighing components to managing hydration during assembly. Seven practical steps will show you how to roll, layer, and bake a professional finish.
Whether making savory appetizers or sweet desserts, control the environment carefully. With the right techniques, making gluten free phyllo dough at home feels rewarding and achievable. Let’s explore how to turn these simple ingredients into a flaky, golden masterpiece.
Key Takeaways
- Measure ingredients by weight for consistent results.
- Maintain proper hydration to prevent the sheets from cracking.
- Use parchment paper to protect the delicate layers while rolling.
- Apply fat carefully between each sheet to ensure a crisp texture.
- Bake at the correct temperature to achieve a golden brown finish.
What Makes Gluten Free Phyllo Dough Different
Understanding dough’s unique traits helps you master gluten free pastry sheets. Traditional baking uses wheat flour to form a protein web. It holds dough together and allows extreme stretching.
Removing wheat removes this natural elasticity. You must balance starches, binders, and water to build a stable structure that mimics the original texture.
How Gluten Changes Stretch, Structure, and Flakiness
Gluten is a protein complex that gives strength and flexibility. Without it, dough cannot form paper-thin layers without snapping back or breaking.
Use flour blends with gums or starches to replace that support. These ingredients help protect your gluten free pastry sheets during rolling.
Why Gluten Free Pastry Sheets Tear More Easily
Without a continuous protein network, these doughs are naturally more fragile. They lack wheat dough’s “memory,” so they do not bounce back when stretched.
This fragility requires careful handling. Parchment paper or silicone mats support thin layers as you move them.
What You Can Still Achieve Without Wheat
Despite these challenges, you can still create professional-quality results. With proper technique, your gluten free pastry sheets can turn golden brown and develop a delicate, satisfying crunch.
The table below shows key differences between these alternative ingredients:
| Feature | Wheat Dough | Gluten Free Dough |
|---|---|---|
| Elasticity | High (stretches easily) | Low (requires support) |
| Structure | Protein-based network | Starch and binder-based |
| Handling | Resilient and forgiving | Delicate and precise |
| Final Texture | Crispy and flaky | Crispy and light |
Choose the Right Ingredients for Flexible, Flaky Dough
A delicate, crispy texture without wheat requires careful pantry choices. A reliable phyllo dough alternative is the first step for recreating classic, paper-thin layers at home. Balance specific flours and starches to copy the structure traditional wheat flour provides.
Build a Balanced Gluten Free Flour Blend
A successful blend often uses light, neutral-tasting flours. Fine white rice flour provides structure without a heavy, gritty texture. Choose a smooth blend so the final sheets stay pliable and roll thin.
Use Starches and Binders for Elasticity
Starches help lighten dough and keep it from becoming too dense. Tapioca starch and potato starch add the needed stretchiness for rolling. Without xanthan gum or psyllium husk, the dough may crumble before shaping.
Select Oil or Dairy-Free Butter for Layering
When you make dairy free phyllo dough, the fat brushed between layers helps create crispness. High-quality olive oil adds savory flavor to Mediterranean-inspired dishes. Plant-based butter offers a richer, more traditional mouthfeel for your vegan phyllo dough recipes.
Make the Dough Vegan and Allergen Free When Needed
If you manage dietary restrictions, always check starch and binder labels. Many commercial products are processed in facilities that handle common allergens. For safety, choose certified allergen free phyllo dough ingredients and enjoy your favorite pastries with peace of mind.
| Ingredient Type | Primary Function | Best Choice |
|---|---|---|
| Base Flour | Provides structure | Fine white rice flour |
| Starch | Adds elasticity | Tapioca or potato starch |
| Binder | Prevents crumbling | Xanthan gum |
| Layering Fat | Creates crispness | Olive oil or vegan butter |
Gluten Free Phyllo Dough: The Seven Tips at a Glance
Professional results with gluten free phyllo dough require careful preparation. Follow these seven tips to create crisp, consistent results every time you bake.
Tip One: Measure Every Ingredient by Weight
Precision matters when using alternative flours. Starches and flours absorb moisture differently, so a digital scale is far more reliable than cups.
Tip Two: Hydrate the Dough Gradually
Add water in small amounts to keep the dough from becoming too sticky or hard to handle. This gradual process activates the binders and builds a stronger structure.
Tip Three: Rest the Dough Before Rolling
Let the dough rest at room temperature before rolling. This gives the flours time to hydrate and improves the elasticity and flexibility of the sheets.
Tip Four: Roll Between Protective Sheets
This dough is weaker than traditional wheat dough, so roll it between two parchment sheets. This prevents tears and makes delicate layers easier to move.
Tip Five: Keep Unused Sheets Covered
Gluten free pastry dries quickly in air. Cover unused portions with a slightly damp towel to keep enough moisture for successful layering.
Tip Six: Brush Each Layer Lightly
Brush each layer lightly with your chosen oil or dairy-free butter. Even coverage matters more than a large amount of fat. It helps every layer become crisp.
Tip Seven: Bake Until Deeply Golden
Bake your gluten free phyllo dough until it turns a deep, rich golden color. This means the inside layers are fully cooked and crisp, not soft or gummy.
Mix and Hydrate the Dough Without Making It Sticky
Your pastry base depends on how you mix the ingredients. With gluten free phyllo dough, mixing affects how easily you can roll the dough later. Careful mixing helps prevent crumbling and excess stickiness.
Combine the Dry Ingredients Evenly
Whisk your flour blend, starches, salt, and binders in a large bowl. It is essential to mix these dry ingredients fully before adding liquid. This step spreads the binders evenly and gives your delicate sheets the needed structure.
Add Warm Water in Small Increments
Gluten-free flours absorb moisture at different rates, so the needed liquid can be hard to predict. Add warm water in small amounts while mixing continuously. This lets you watch hydration closely and keeps the dough from becoming gummy.
Adjust the Dough When It Feels Dry or Wet
Aim for a cohesive, soft, and pliable texture. If the mixture feels dry or crumbly, add tiny splashes of water, one at a time. If it feels too sticky or wet, sprinkle in a little flour blend until it pulls cleanly from bowl sides.
Use Oil to Improve Handling and Tenderness
Adding a small amount of oil while mixing your gluten free phyllo dough improves elasticity. Oil lubricates the dough, making it easier to handle without sticking to fingers or your work surface. It also keeps baked layers tender instead of tough or brittle.
Rest the Dough for Better Flexibility
The right pastry consistency needs a short, important wait. Proper gluten free dough resting helps ingredients settle before you roll the dough.
Why Resting Helps Hydrate Gluten Free Flours
Unlike wheat recipes, gluten free flour hydration takes time. The starches and flours in your blend need time to absorb moisture fully.
Letting dough sit spreads water evenly through the mixture. This removes dry pockets that could make dough crumble or break during shaping.
How to Wrap the Dough to Prevent a Dry Skin
Air can harm smooth, elastic dough. A dry surface forms a crust that cracks when you press it with a rolling pin.
Wrap dough tightly in plastic wrap or place it in an airtight container. This traps moisture and keeps the outside soft and pliable until you work.
How Long to Rest the Dough at Room Temperature
No universal time works because humidity and flour types vary. Instead, focus on the dough’s tactile feedback.
Let the dough rest at room temperature until it feels relaxed and soft. Press it gently with your finger; it should yield without springing back hard. This shows its tension has eased.
When Refrigeration Helps and When It Makes Rolling Harder
Some recipes suggest chilling, but watch the temperature. Refrigeration helps if your dough contains solid fats that became too warm. It firms them for easier handling.
Too much chilling can make dough brittle and hard to roll thin. If you refrigerate dough to improve pastry dough flexibility, let it return to cool room temperature. Then stretch it into thin sheets.
Roll Thin Gluten Free Pastry Sheets Without Tearing
Rolling delicate dough can feel hard, but smaller steps make the process easier. When using gluten free pastry sheets, handle them gently so they stay intact. A careful method helps you reach the right thinness without repeated breaks.
“Patience is the secret ingredient in every great pastry; treat your dough with care, and it will reward you with a perfect, crisp finish.”
Divide the Dough Into Manageable Portions
A large piece of dough can create uneven thickness and accidental tears. Divide it into smaller, golf-ball-sized portions for better rolling control. This approach helps you create a more even texture.
Roll Between Parchment or Silicone Sheets
Because gluten free dough lacks wheat’s natural stretch, it can stick and tear. Roll it between two sheets of parchment paper or silicone mats for necessary structural support. This barrier keeps the dough from sticking to your rolling pin or counter, so you can remove the top layer easily.
Lift and Rotate the Dough Safely
Do not pull or stretch the dough from one edge, or it may tear. After a few passes, lift the parchment and turn the dough one-quarter turn. This method helps the phyllo sheets spread evenly without creating thin, weak spots.
Trim Uneven Edges for Consistent Phyllo Layers
Even with good technique, dough edges may look ragged or become too thick. Trim them with a sharp knife or pizza cutter for a clean, even shape. This makes layering easier and prevents thick patches from harming the final crisp texture of your gluten free pastry sheets.
Keep Phyllo Sheets Moist While You Work
Because gluten free filo lacks wheat dough’s natural elasticity, it dries out quickly. These thin sheets hold little moisture and expose a large surface to kitchen air.
Cover Finished Sheets With a Clean Damp Towel
Cover finished pastry sheets with a clean, lightly damp towel to keep them flexible. The towel traps humidity without soaking the dough.
Keep the towel slightly moist, not dripping wet. Direct contact with too much water can ruin your delicate layers.
Prevent Excess Moisture From Making Layers Gummy
Hydration matters, but avoid soaking the pastry. If the towel is too wet, the gluten free filo will absorb liquid and become gummy or sticky.
Extra moisture stops the layers from becoming crisp during baking. Wring out the towel well before placing it over your work.
Work in Small Batches for Better Control
Work in small batches when handling thin pastry. This keeps the sheets exposed to open air for less time.
Keep the remaining dough wrapped or covered while assembling one portion. This simple method gives you better control over the final result.
Recover and Reroll Scraps Without Overworking Them
Leftover edges and small tears are normal during assembly. Gently gather the scraps and reroll them once to reduce waste.
Handle the dough gently, because repeated kneading can make the gluten free filo dense or fragile. Use a light touch to protect the pastry.
Layer Gluten Free Filo Pastry for Crisp, Flaky Results
When using gluten free filo pastry, spreading fat between layers shapes your bake’s final texture. Fat forms a barrier that keeps thin sheets from sticking, so steam can create airy pockets. Without this separation, pastry may become dense or gummy instead of light and shattered.
Brush Oil or Dairy-Free Butter From Edge to Edge
Apply your chosen fat lightly and evenly across each sheet’s entire surface. With high-quality dairy free phyllo dough, precision matters because dry spots can bake into tough, brittle patches. Avoid pooling oil, which can create a greasy, heavy result that fails to crisp.
Stack Sheets Without Pressing Out Their Air
Handle the sheets gently as you build your layers. Resist the urge to press down on the stack, because this compresses the delicate air spaces you want to preserve. Loose, fluffy layers create a professional, flaky finish in your home kitchen.
Use Fewer Layers for Delicate Pastries and More for Structure
Choose the number of layers based on the specific recipe. For light, sweet pastries, fewer layers let the filling shine without an overwhelming crust. For a heavy, savory pie, add layers for structural integrity that can hold the ingredients’ weight.
Choose a Phyllo Dough Alternative for Different Fillings
A traditional thin sheet may not suit every recipe. For exceptionally wet or heavy fillings, choose a phyllo dough alternative, such as a slightly thicker gluten-free pastry sheet. This keeps your creation stable during baking without sacrificing its desired crunch.
| Filling Type | Layer Count | Fat Application | Best Result |
|---|---|---|---|
| Light Fruit | 4-6 Layers | Very Light | Crisp & Delicate |
| Savory Spinach | 8-10 Layers | Moderate | Sturdy & Flaky |
| Heavy Meat/Nut | 12+ Layers | Generous | Structured & Golden |
Fill and Shape Gluten Free Greek Pastry Sheets
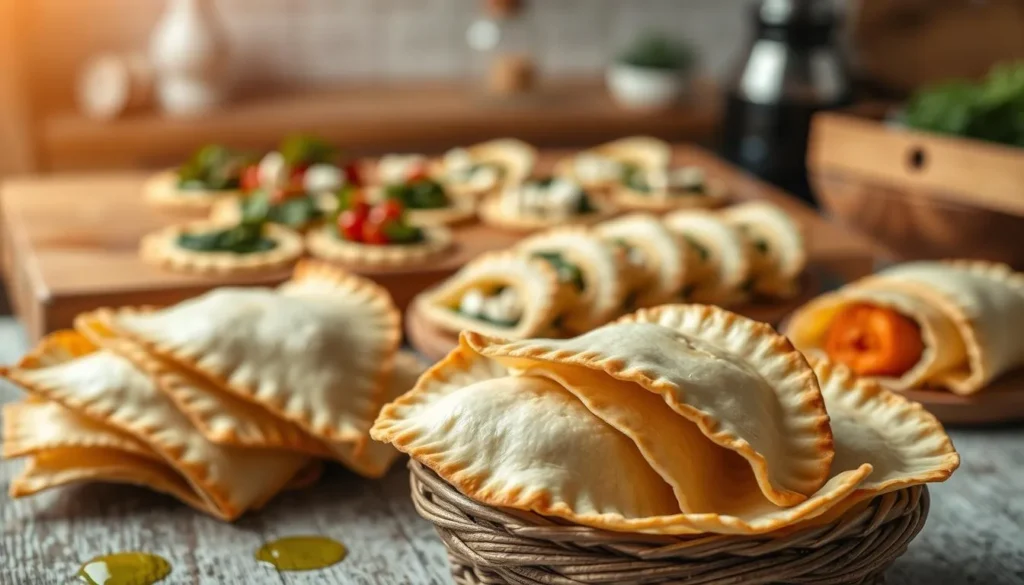
When using gluten free Greek pastry sheets, fold and seal fillings carefully to create the right texture. These sheets lack wheat dough’s stretch, so handle them gently to prevent tears.
Cool Wet Fillings Before Adding Them to the Dough
Always cool fillings fully before placing them on the pastry. Warm or hot ingredients release steam and can make delicate layers soggy and hard to manage. Cooling the mixture helps the dough keep its shape during assembly.
Prevent Spinach, Cheese, and Fruit Fillings From Leaking
Too much moisture can ruin crisp pastry. For spinach, squeeze out all liquid with a clean kitchen towel. For cheese or fruit, add a little starch to hold juices inside the gluten free Greek pastry sheets rather than on the baking tray.
Shape Triangles, Rolls, Cups, and Layered Pies
Work methodically to make several shapes. For triangles, fold a strip’s corner over the filling and continue in a zigzag pattern. Press dough gently into a muffin tin for cups, or tuck rolls loosely so pastry can expand slightly while baking.
Seal Edges Without Compressing the Layers
Brush the edges lightly with oil or melted butter. Press very gently with your fingertips to secure the seal without flattening delicate, flaky layers. A light touch keeps the pastry airy and light after baking.
| Filling Type | Preparation Method | Best Shape |
|---|---|---|
| Spinach & Feta | Squeeze dry and chill | Triangles |
| Sweet Fruit | Thicken with starch | Cups |
| Savory Cheese | Drain excess oil | Rolls |
| Nut & Honey | Keep mixture coarse | Layered Pies |
Bake Phyllo Sheets Until Crisp and Golden
Baking is the final step in turning delicate dough into a golden masterpiece. Handle phyllo sheets gently, then let the oven create their signature crisp, shattering texture. Good heat control keeps the pastry light, airy, and cooked throughout.
Preheat the Oven and Position the Baking Rack
Preheat your oven fully before placing the tray inside. A hot oven crisps layers at once, while slow drying can make them tough or chewy. Place the rack in the center so heat surrounds your gluten free greek pastry sheets evenly.
Use the Correct Pan for Even Browning
Your pan choice affects how the pastry browns. Metal pans conduct heat well and help create a crisp bottom crust. Glass heats more slowly, so it may need a slightly longer bake for similar results.
Recognize the Difference Between Crisp and Underdone
Knowing when to remove the pastry helps you serve the best result. Use these visual and touch clues to check that your pastry is ready:
- The surface should display a deep golden color across the entire top.
- The edges should look firm and slightly pulled away from the sides of the pan.
- The texture must feel dry and crisp to the touch, rather than soft or doughy.
Protect the Top if It Browns Too Quickly
The top may brown before the center becomes crisp. If it darkens too quickly, stay calm. Loosely cover the pan with aluminum foil, protecting the top while the pastry finishes baking evenly.
Troubleshoot Common Gluten Free Filo Problems
Even experienced bakers face problems when working with gluten free filo. The process needs care, but hydration and room temperature cause many issues. Spot these problems early, then adjust your method for professional results every time.
Repair Dough That Cracks During Rolling
Cracking usually means your dough is too dry or needs more resting time. If the edges split while rolling, add a tiny amount of warm water. Always ensure the dough rests at room temperature so the starches hydrate and improve elasticity.
Handle Sheets That Stick to Parchment
If sheets will not lift from parchment, excess moisture or too little dusting may be the cause. Lightly dust your work surface with a blend of starch and flour before rolling. If a sheet sticks, wait briefly for its surface to dry before lifting it.
Fix Tough, Dry, or Gummy Baked Layers
Tough or dry pastry often comes from over-baking or too much flour while rolling. Gummy layers can result from too much oil or butter between sheets. Use a light hand when brushing your gluten free filo, so fat absorbs evenly without saturating the dough.
Prevent Soggy Bottoms and Uneven Browning
Soggy bottoms usually come from wet fillings that were not drained well. Cool fillings completely before assembly, preventing steam from softening the pastry. Place the pan on the oven’s lower rack to improve heat circulation and create a crisp, golden finish.
| Common Issue | Primary Cause | Quick Fix |
|---|---|---|
| Cracking | Low hydration | Add water/rest longer |
| Sticking | Excess moisture | Use more dusting flour |
| Gummy Texture | Too much fat | Brush layers lightly |
| Soggy Bottom | Wet filling | Drain filling well |
Store and Use Your Homemade Phyllo Dough
After mastering dough making, learn how to store it. Proper storage keeps your gluten free filo pastry ready for future projects.
Refrigerate or Freeze Unbaked Gluten Free Pastry Sheets
Protect your dough from air, which quickly dries it out. Wrap sheets tightly in plastic wrap or use an airtight container before refrigeration or freezing.
When freezing dough, place parchment paper between each layer to prevent sticking. This makes the sheets easier to separate before baking.
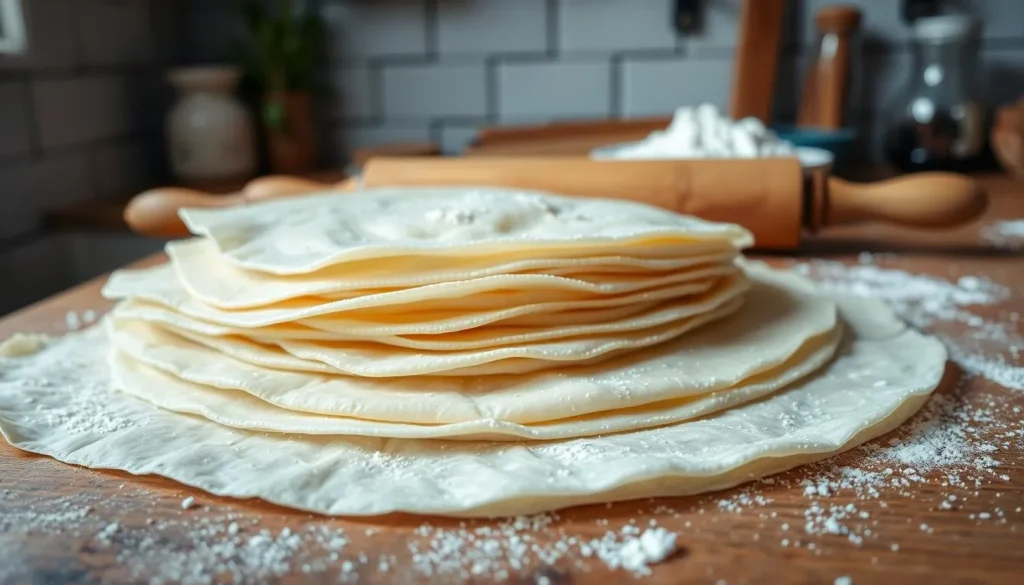
Thaw Frozen Sheets Without Creating Condensation
Thaw frozen dough slowly in the refrigerator while it stays wrapped. This prevents moisture from collecting on the surface.
“The quality of your final bake depends entirely on how well you manage moisture during the thawing process.”
Condensation can make sheets gummy and hard to handle. Keep them covered until room temperature to protect your allergen free phyllo dough.
Store Baked Pastries for the Best Texture
Baked goods taste crispest soon after leaving the oven. Moisture from fillings or air will soften their delicate layers over time.
If needed, store them in a container with a loose lid for airflow. Reheat pastries in a warm oven for a few minutes to restore their crunch.
Use the Dough in Sweet and Savory Recipes
Your homemade vegan phyllo dough works well in many dishes. Make a sweet fruit strudel or a savory vegetable roll.
| Recipe Type | Filling Suggestion | Best Serving Temp |
|---|---|---|
| Sweet Pastry | Spiced Apples | Warm or Room Temp |
| Savory Pie | Spinach and Herbs | Hot |
| Appetizer | Roasted Vegetables | Warm |
Use your allergen free phyllo dough to make impressive layered pies for every guest. Try different fillings to highlight your vegan phyllo dough in every bite.
Conclusion
Making high-quality gluten free phyllo dough takes patience and precision. You now know how to manage hydration, resting times, and delicate rolling motions. These gluten free pastry techniques turn simple ingredients into professional results at home.
Success depends on adapting to your flour blend’s needs. Watch your dough’s texture closely while you work. Adjust moisture as the dough feels under your hands, rather than following rigid measurements alone.
Keep your sheets covered and brush each layer with care. Manage your fillings and bake until the pastry turns deep golden for a crisp, professional finish. Now, you can create a flaky gluten free pastry that rivals traditional wheat versions.
Scratch-made baking opens endless sweet and savory possibilities. Use these methods with your favorite recipes for consistent, delicious results every time you bake. Your kitchen is ready for your next culinary creation.
FAQ
Why is gluten free phyllo dough more fragile than traditional wheat-based pastry?
Traditional pastry uses gluten to form a stretchy, elastic network for paper-thin sheets. Because gluten free pastry sheets lack this protein. Blends from Bob’s Red Mill or King Arthur Flour use starches and binders for structure. Without gluten, dough tears more easily, so a phyllo dough alternative needs extra care when rolling and layering.
How can I ensure my gluten free filo remains flexible enough to roll?
Success starts with hydration and resting. Measure ingredients by weight, not volume, then add warm water in small amounts. Let the gluten free filo pastry rest at room temperature; this spreads moisture, improving pliability and handling.
What can I use to make a dairy free phyllo dough or vegan phyllo dough?
To create a vegan phyllo dough, replace butter with high-quality plant-based fats. Earth Balance buttery sticks or Miyoko’s Creamery European-style cultured vegan butter work well between phyllo sheets. Use avocado or grapeseed oil for a neutral flavor and a crisp, golden finish in a dairy free phyllo dough.
What is the best technique for rolling out gluten free greek pastry sheets without them sticking?
Because this dough lacks elasticity, roll it between parchment paper or silicone baking mats. This keeps the gluten free greek pastry sheets from sticking to the pin or counter. A light tapioca dusting helps tacky dough, but excess flour can make baked allergen free phyllo dough dry or tough.
How do I prevent my gluten free filo pastry from becoming soggy after baking?
Sogginess usually happens when wet fillings, such as spinach or fruit, release moisture into the phyllo sheets. Prevent this by cooling and thoroughly draining fillings before assembly. Brush each layer lightly with oil or melted vegan butter, and bake until deeply golden. A preheated oven makes fat sizzle immediately, creating air pockets for a shatteringly crisp texture.
Can I store or freeze homemade allergen free phyllo dough?
Yes, you can prepare gluten free filo in advance. Wrap unbaked sheets tightly in plastic wrap, then refrigerate up to two days or freeze for longer storage. Thaw them slowly in the refrigerator while wrapped to prevent condensation and gummy gluten free pastry sheets.
Why is my baked gluten free phyllo dough tough instead of flaky?
Toughness often comes from overworking the dough or using too much binder, such as xanthan gum. Separate each layer of gluten free filo pastry with thin fat coating so they bake into distinct, crisp leaves. Firmly pressed layers block air when shaping triangles or pies, causing a dense, hard texture instead of light flakiness.