
Table of Contents
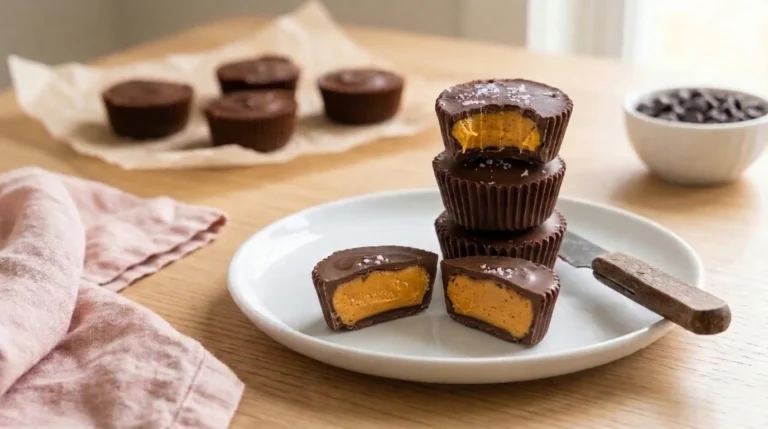
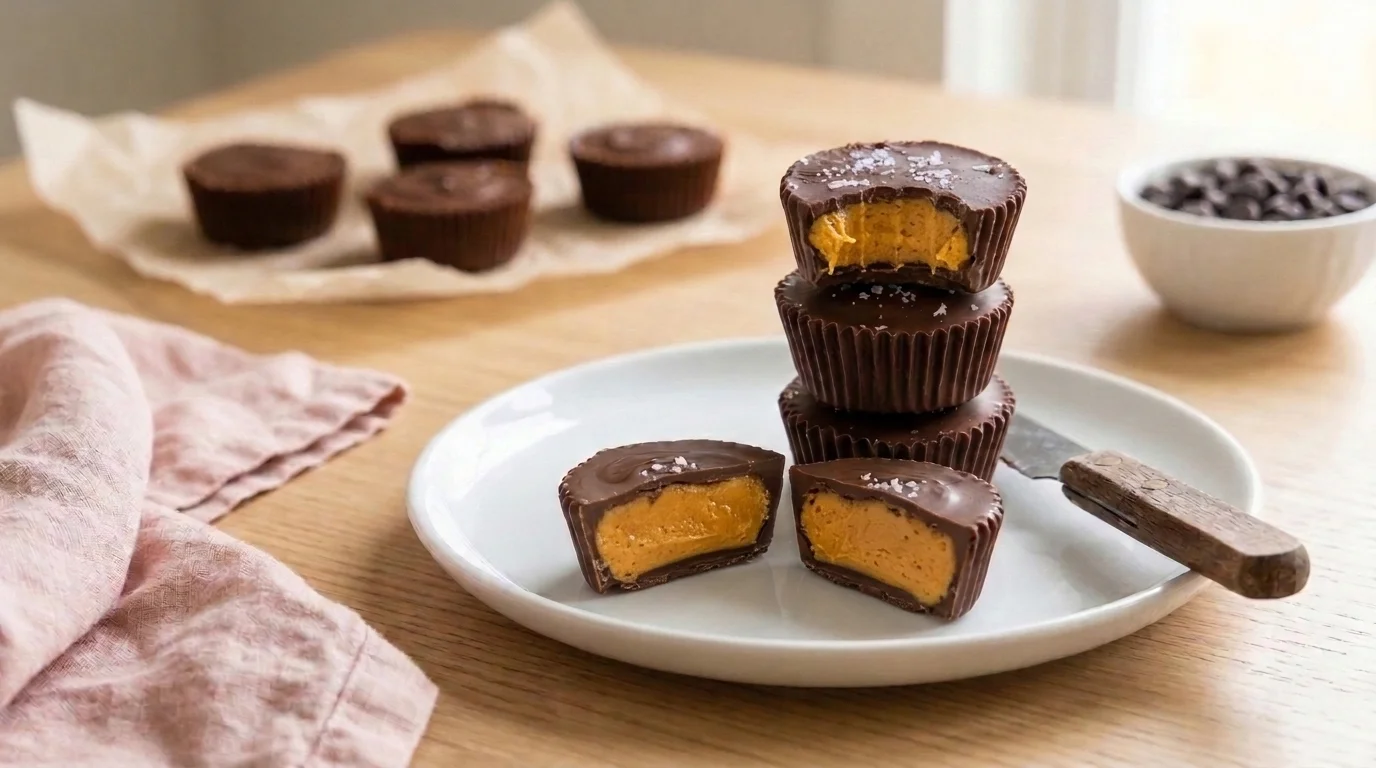
Homemade Reese’s peanut butter cups are so easy, and you don’t even turn on the oven! It’s a thin chocolate shell, a soft peanut butter center, more chocolate on top, and a short chill. This version is gluten-free, with no graham crackers in the filling at all.
With homemade Reese’s peanut butter cups, the middle is what I care about most. It should taste like the candy center: sweet, a little salty, slightly crumbly. Below is how to get that texture and the trick that stops the peanut butter peeking out the sides.
I make these for my kid, for myself when a candy craving hits, and for holiday gift tins. I like knowing exactly what went into them. They came out right on the first batch, and my kid loved them.
How do you make homemade Reese’s peanut butter cups?
Melt the chocolate and spoon a thin layer into paper liners in a muffin tin, brushing it a little way up the sides. Chill until set. Press a flat disc of peanut butter filling on top, cover it with more melted chocolate, tap the pan on the counter, and chill 20 to 30 minutes.
The full steps for these homemade Reese’s peanut butter cups are in the recipe card. In short:
- Mix the filling, check the texture, and shape it into flat discs.
- Melt half the chocolate and coat the bottom of each liner.
- Chill the base about 10 minutes, until firm.
- Press in the discs and cover with the rest of the chocolate.
- Tap the pan and chill 20 to 30 minutes.
Why chill twice? If the base is still soft, the filling sinks right through and you’ll see peanut butter on the bottom of the cup.
Making Reese’s peanut butter cups homemade takes about an hour from start to finish, and most of that is chilling time.

Ingredients and the labels to check
- Chocolate: Milk chocolate makes homemade Reese’s peanut butter cups taste closest to the candy. Semi-sweet is less sweet, and a half-and-half mix lands in between. Chips or a chopped bar both work. For a thinner, glossier coat, melt in 2 teaspoons of coconut oil (1 teaspoon per half).
- Creamy peanut butter: A no-stir kind gives the firmest filling. Natural peanut butter (oil on top) works but needs more powdered sugar.
- Powdered sugar (icing sugar in the UK): Sets the filling and gives it that dry, sandy bite.
- Light brown sugar: Just 2 tablespoons, for a little caramel flavor and grain.
- Butter: Melted, so the filling isn’t stiff. Dairy-free butter works.
- Salt and vanilla: Don’t skip the salt. That 1/4 teaspoon is what makes it taste like candy and not just sweet peanut butter.
To make homemade Reese’s peanut butter cups, you’ll also need a muffin tin, paper liners, a small spoon or clean pastry brush, and a microwave-safe bowl. A kitchen scale makes dividing the filling much easier.

Are homemade Reese’s cups gluten-free?
Yes, as long as every ingredient is. Peanut butter, chocolate, sugar and butter are naturally gluten-free, but check the labels on your chocolate chips (some contain barley malt or are made on shared lines) and your powdered sugar. Many recipes add graham crackers, which contain wheat. This one doesn’t.
That’s the nice part of making Reese’s peanut butter cups homemade: you can check every label yourself.
In the US, a food labeled gluten-free has to contain less than 20 parts per million of gluten (here’s the FDA’s gluten-free labeling rule). My kid and I are both gluten intolerant, so I’d read the chocolate label every time, even on a brand you’ve bought before, because recipes and factories change. Give the peanut butter and vanilla a quick look too. Any brand of chocolate chips works here, as long as the bag says gluten-free.
Wondering about the store-bought candy? Check the package and the maker’s current info, since seasonal shapes can differ.
Can you make them without graham crackers?
Yes, and this recipe already does.
A lot of homemade Reese’s peanut butter cups recipes add graham cracker crumbs to soak up oil and give the filling a grainy bite. Here powdered sugar does the firming and brown sugar adds the grain.
Want crumbs anyway? Crush certified gluten-free graham-style crackers very fine and add about 1/4 cup per batch. Cut the powdered sugar by 2 tablespoons so the filling doesn’t get too dry.
Almond flour works too. Two to three tablespoons firm up a soft filling and add a nutty taste, but the filling won’t be quite as smooth.
How to get the filling texture right
Pinch off a bit and squeeze it. It should feel like soft play dough: it holds a fingerprint, rolls into a ball without sticking to your hands, and the edge looks slightly crumbly when you break it.
Too soft or oily? That’s common with natural peanut butter. Add powdered sugar 1 tablespoon at a time, or chill the bowl for 10 minutes, because peanut butter firms up as it cools.
Too dry and cracking? Add 1 teaspoon of peanut butter or melted butter at a time.
A maple syrup filling (no powdered sugar) stays soft and needs the freezer, so it won’t give you the candy-style center.
Once it feels right, roll it into balls, press them into flat discs on parchment, and chill the discs while the base sets.
How to keep the peanut butter from showing on the sides
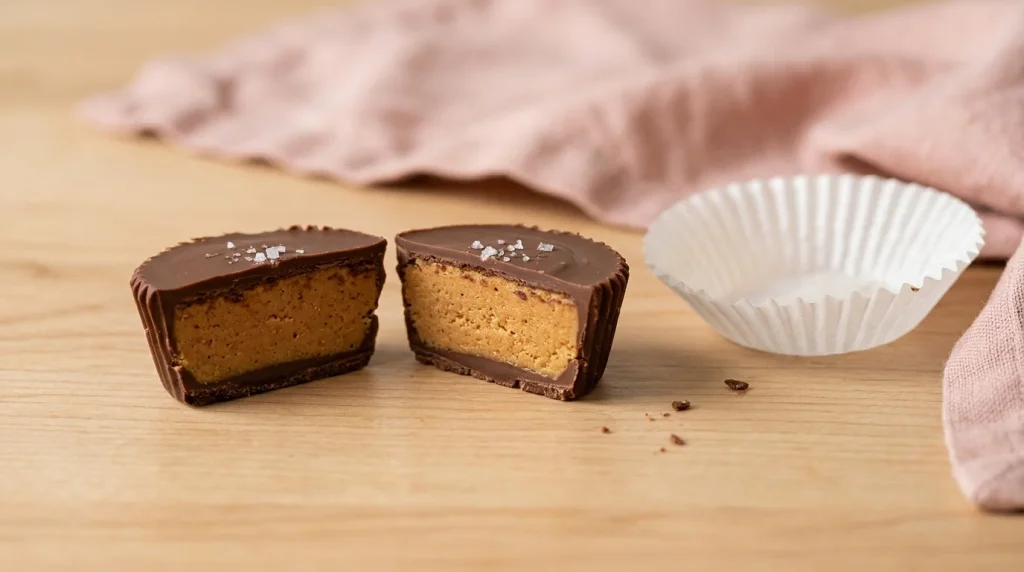
Peanut butter peeking out the sides is the most common problem with homemade Reese’s peanut butter cups. The fix starts with the filling: make each disc a little smaller than the liner, with about a 1/4 inch (5 mm) gap all around. That gap is where the top chocolate runs down and seals the sides.
Brush or spoon the base chocolate a little way up the liner walls, then chill it until firm, about 10 minutes. Press each disc flat so it sits below the rim. If it sticks up, there’s no room for chocolate on top.
Spoon on enough chocolate to cover the filling completely, then tap the pan on the counter a few times to level it and pop air bubbles.
Streaky or grayish chocolate later? That’s bloom, from a warm kitchen or moving the cups between fridge and counter. Not pretty, but safe to eat.
Mini or regular size: how much chocolate and filling per cup
Each homemade Reese’s peanut butter cup gets the same three layers, just in different amounts. With the recipe card amounts:
- Regular liners (12 cups): about 2 teaspoons (14 g) melted chocolate for the base, about 2 tablespoons (32 g) filling pressed into a 2-inch disc, and about 2 teaspoons (14 g) chocolate on top.
- Mini liners (about 30 cups): a scant teaspoon (about 5 g) chocolate for the base, about 2 teaspoons (12 g) filling pressed into a 1 1/4-inch disc, and a scant teaspoon (about 5 g) on top. Minis chill faster, so check the base after 5 to 7 minutes.
I made the regular size, and these amounts were just right for 12 cups. Want a topping? Right after you tap the pan, sprinkle on chopped peanuts, chopped almonds, sesame seeds or shredded coconut (check those labels too), then chill as usual.
Silicone molds and holiday shapes (hearts, trees, eggs) work the same way. For a candy tin or dessert board, they sit nicely next to no-bake brownies.
Dairy-free and other swaps
For dairy-free cups, use dairy-free butter in the filling (I always have some in the fridge) and dairy-free chocolate chips that are also labeled gluten-free. I have more gluten-free dairy-free cookies if you bake that way.
Almond butter or sunflower seed butter can replace the peanut butter (sunflower makes them peanut-free, but check every label for shared equipment if you’re baking for an allergy). Both make a softer filling, so you may need an extra tablespoon of powdered sugar.
- Crunchy peanut butter: same amount, for little bits of peanut in the middle.
- Flaky salt: a pinch on each cup right after tapping the pan.
- Caramel: about 1/2 teaspoon spread on each regular disc before the top chocolate, kept away from the edges so it doesn’t leak. If it’s store-bought caramel, check the label.
How to store and freeze homemade Reese’s
Keep homemade Reese’s peanut butter cups in an airtight container in the fridge, with parchment between the layers, for up to 2 weeks. My batch was still good after about a week in the fridge.
They’re fine out for a few hours on a cool day, but a warm room softens the chocolate fast. To freeze, keep them up to 3 months and thaw in the fridge, not on the counter, so water doesn’t bead up on the chocolate.
For gifts, pack mini homemade Reese’s peanut butter cups in paper cases in a holiday tin and keep it somewhere cool. They fit in Halloween treat bags too.

Homemade Reese’s peanut butter cups FAQ
Do I need to temper the chocolate?
No. Melt it gently in short bursts and keep the cups in the fridge. Tempering gives more snap and shine at room temperature, but you don’t need it for cups that live in the fridge.
Why did my chocolate get thick and grainy?
It seized, from a drop of water or too much heat. Melt in 15 to 20 second bursts, stir between each one, and use a completely dry bowl and spoon. Seized chocolate won’t coat smoothly, so stir it into brownie batter and melt a fresh batch.
Can I make them without cupcake liners?
Yes. Silicone molds or a silicone mini muffin pan work best, because the cups pop right out after 10 minutes in the freezer. A metal tin without liners tends to hold on to the chocolate. You can also make one slab in a parchment-lined pan and cut it into squares.
Can I use natural peanut butter?
You can. Stir it really well so the oil is mixed back in, and expect to add more powdered sugar. The filling ends up a bit softer and less sweet.
How long do they take to set?
About 10 minutes in the fridge for the base and 20 to 30 minutes after the top layer. The freezer is quicker if you’re in a hurry.
Since they keep so well, you can make a batch of homemade Reese’s peanut butter cups ahead for the holidays and tuck it in the freezer until you need it. For more peanut butter, try my gluten-free peanut butter cookies or these no-bake chocolate oatmeal cookies.
If you make these homemade Reese’s peanut butter cups, leave a rating in the recipe card and tell me in the comments which size you went with!