
Table of Contents
Vanilla bean panna cotta (naturally gluten free)
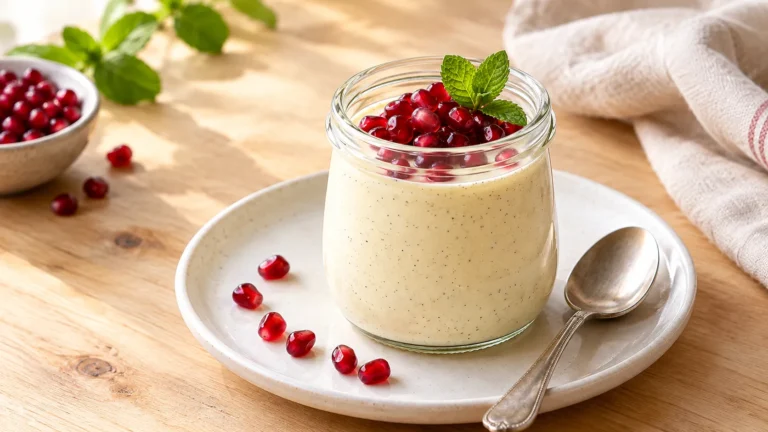
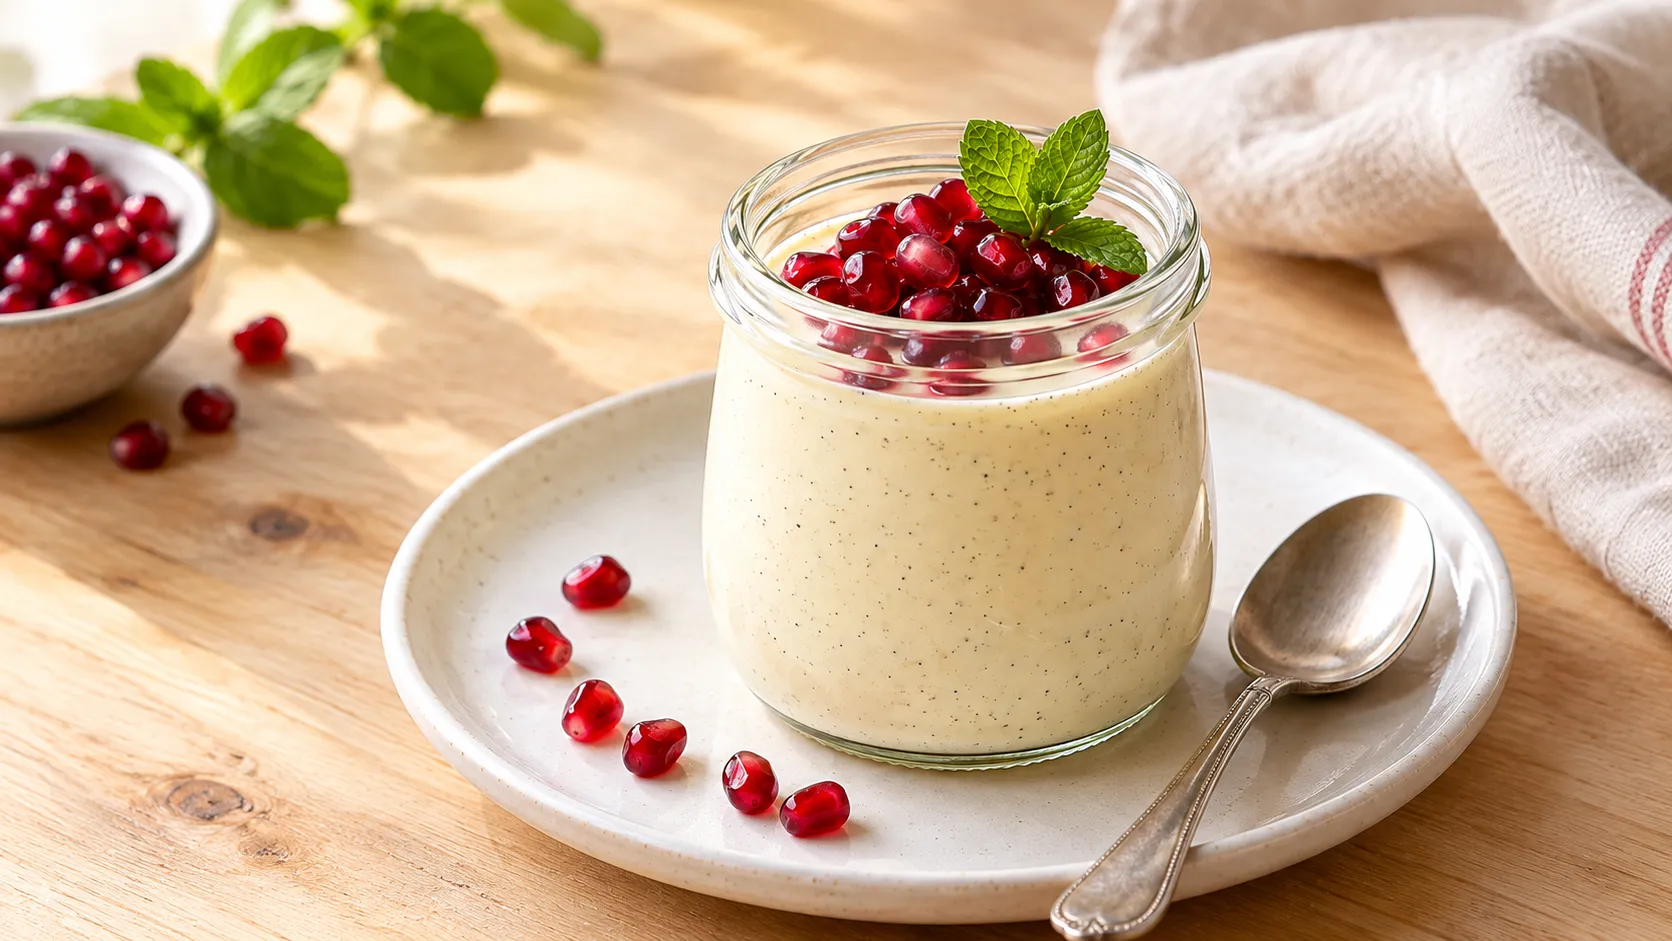
This vanilla bean panna cotta is cold, creamy, and full of tiny black vanilla specks. It sets in little jars with a soft wobble, and it takes about 15 minutes of actual work. The fridge does the rest!
This is the dessert I make for my family when I want something special without turning on the oven. Panna cotta is naturally gluten free, so there’s no flour blend to buy and nothing to swap out. And honestly? It’s one of the few desserts I can eat without my stomach feeling bloated afterward, which is a big part of why it’s on repeat at our house.
You only need cream, milk, sugar, gelatin, and real vanilla. That’s it. The trick is in a few small steps (blooming the gelatin, not boiling the cream too hard, and stirring before you pour), and I’ll walk you through each one below.
Is panna cotta gluten free?
Yes. Classic panna cotta is made from cream, milk, sugar, gelatin, and a flavoring, and none of those contain gluten. Nothing gets thickened with flour or starch, because the gelatin does all the setting.
The name means “cooked cream” in Italian, and that’s really all it is: sweet vanilla cream, warmed just long enough to melt the sugar and the gelatin, then chilled until it sets.
That said, a few things are worth a quick label check, especially if you’re making it for someone with celiac disease:
- Vanilla bean paste: Most are just vanilla, sugar, and a natural thickener, but brands vary. Read the label once and you’re set.
- Gelatin: Use plain, unflavored powdered gelatin. Flavored gelatin mixes are a totally different product and won’t work here.
- Toppings: This is where gluten sneaks in. Fresh fruit, berry sauce, and mint are fine. Store-bought cookies, granola, and crumbles usually aren’t, unless the package says gluten free. The Celiac Disease Foundation keeps a handy list of hidden gluten sources if you want to double-check something.
A quick note on labels: in the US, anything sold as “gluten free” has to contain less than 20 parts per million of gluten, under the FDA’s gluten-free labeling rule. So when you’re buying vanilla paste or cookies for the topping, that’s the label to look for.
If you want a little crunch on top, a crumbled homemade gluten-free cookie is the easy fix (I’ve linked a couple of mine further down).
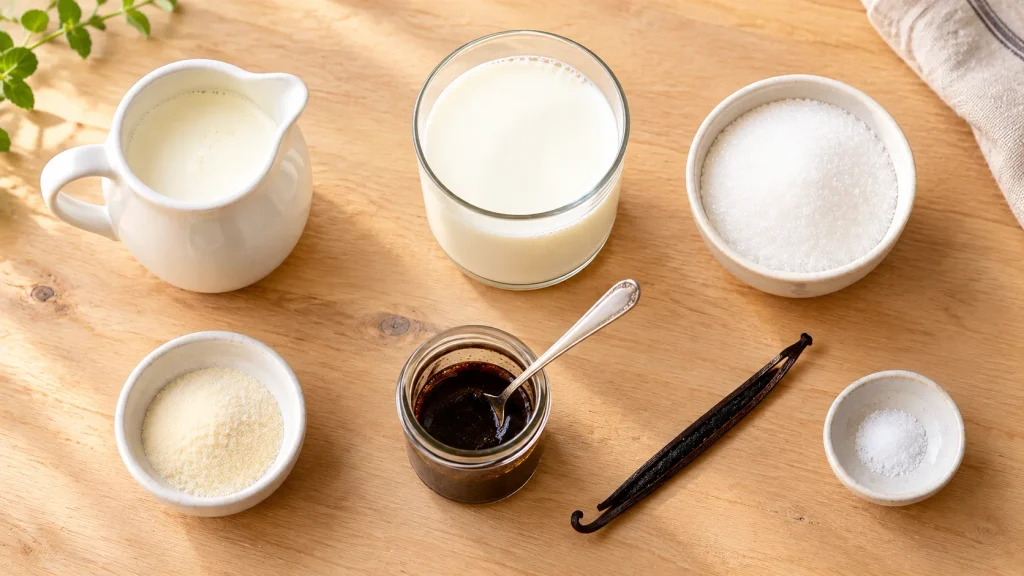
Ingredients for this vanilla bean panna cotta recipe
- Unflavored powdered gelatin: One standard packet is about 7 grams (2 1/4 teaspoons). That’s the right amount for 3 cups of cream and milk, firm enough to hold its shape in a jar but still soft on the spoon.
- Cold water: Just 3 tablespoons, for blooming the gelatin.
- Heavy whipping cream: This is what makes it rich and silky. Don’t swap in half-and-half for all of it, or the panna cotta will taste thin and set a little rubbery.
- Whole milk: Lightens the cream so it’s not too heavy. You can swap it for chia water (see below).
- Granulated sugar: 1/2 cup gives a gentle sweetness. Remember it’ll taste sweeter warm than cold, so taste before chilling and don’t panic.
- Vanilla bean paste or a vanilla bean: Either one gives you those pretty little specks. I use 2 teaspoons of paste, or you can scrape the seeds from 1 whole bean and drop the empty pod into the pan while the cream warms (fish it out before pouring). Vanilla extract works in a pinch, but you lose the specks and some of that deep vanilla flavor.
- Salt: A small pinch. You won’t taste salt, but the vanilla tastes rounder with it.
For serving (all optional): pomegranate seeds, fresh berries, and mint leaves.
Equipment
A medium saucepan, a whisk, a small bowl, and seven 4-ounce glass jars or ramekins. A measuring cup with a spout makes pouring a lot less messy.
How to make panna cotta
Bloom the gelatin first. Pour the 3 tablespoons of cold water into a small bowl and sprinkle the gelatin evenly over the top. Don’t dump it in one pile, or the middle stays dry and turns into lumps later. After 5 minutes it’ll look wrinkly and spongy, like applesauce that set.
Warm the cream. In a medium saucepan, combine the cream, milk, sugar, vanilla, and salt. Heat over medium until you see small bubbles around the edges and the sugar is fully dissolved (rub a drop between your fingers, it shouldn’t feel gritty). You don’t need a rolling boil here. Just a gentle simmer.
Add the gelatin off the heat. Take the pan off the stove, then whisk in the bloomed gelatin for about 30 seconds, until it’s completely melted. Lift the whisk and look: no clear jelly blobs should be clinging to it.
Let it cool for 15 to 20 minutes. This is the step most recipes skip! If you pour it while it’s hot, all the vanilla seeds sink and you end up with a speckled bottom and a plain white top. Let it cool until it’s just warm, give it a good stir, then pour.
Pour and chill. Divide the mixture between seven 4-ounce jars (just under 1/2 cup each). Chill uncovered until cold, then cover and leave them for at least 6 hours. Overnight is even better.
Tips for a silky panna cotta
Measure the gelatin. Too little and it won’t set, too much and it bounces like jello. If you’re using gelatin from a big tub instead of a packet, level off 2 1/4 teaspoons.
Don’t boil the cream hard. A gentle simmer is plenty. Boiling for a long time can make the cream taste cooked and can weaken the gelatin once it goes in.
Strain it if you want it perfectly smooth. Pouring through a fine sieve catches any little bits of gelatin that didn’t melt. The vanilla specks are small enough to pass right through.
Chill on a level shelf. Sounds obvious, but a tilted shelf gives you slanted panna cotta. (Unless you want slanted. Some people do it on purpose in a muffin tin!)
Why didn’t my panna cotta set?
Usually it’s one of two things: the gelatin wasn’t measured right, or it didn’t fully melt into the cream. If the jars are still liquid after 6 hours, give them a few more hours, because some batches just take longer. If they’re still runny the next morning, you can pour everything back into the pan, warm it gently, whisk in another 1/2 packet of bloomed gelatin, and chill again.
And if it’s too firm or rubbery? Next time, use a little less gelatin (about 1 3/4 teaspoons) or swap a few tablespoons of milk for more cream.
Can you make panna cotta with chia seeds instead of milk?
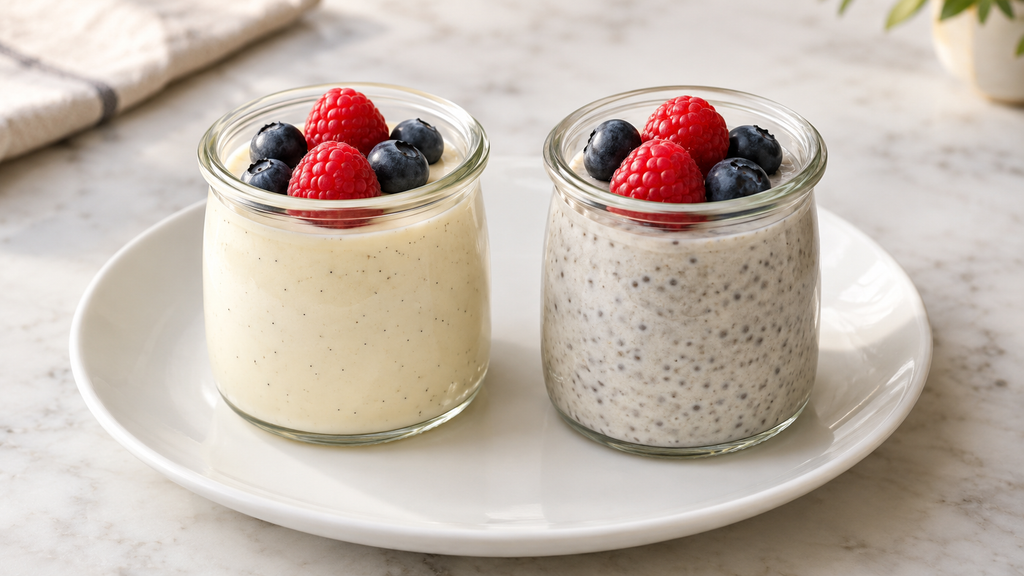
Yes! I’ve made it this way too. I grind chia seeds into a fine powder, stir the powder into boiled water, and let it sit for 12 hours. It turns into a thick, cloudy chia water that I use in place of the 1 cup of milk.
It works because the gelatin is still doing the setting. The chia just replaces the milk part of the liquid. Here’s what changes:
- Texture: Chia makes its own gel, so this version comes out a little thicker and not quite as glassy-smooth. If you want it closer to the original, pour the chia water through a fine sieve or a nut milk bag before using it.
- Color: Black chia gives the cream a light gray tint with darker flecks. White chia keeps it much closer to the classic ivory color.
- Flavor: Slightly nutty. The vanilla still comes through.
Two quick notes. Let the chia water soak in the fridge, not on the counter, since it’s sitting for 12 hours. And this swap isn’t dairy free, because the 2 cups of cream are still in there. It just replaces the milk.
Toppings and serving ideas
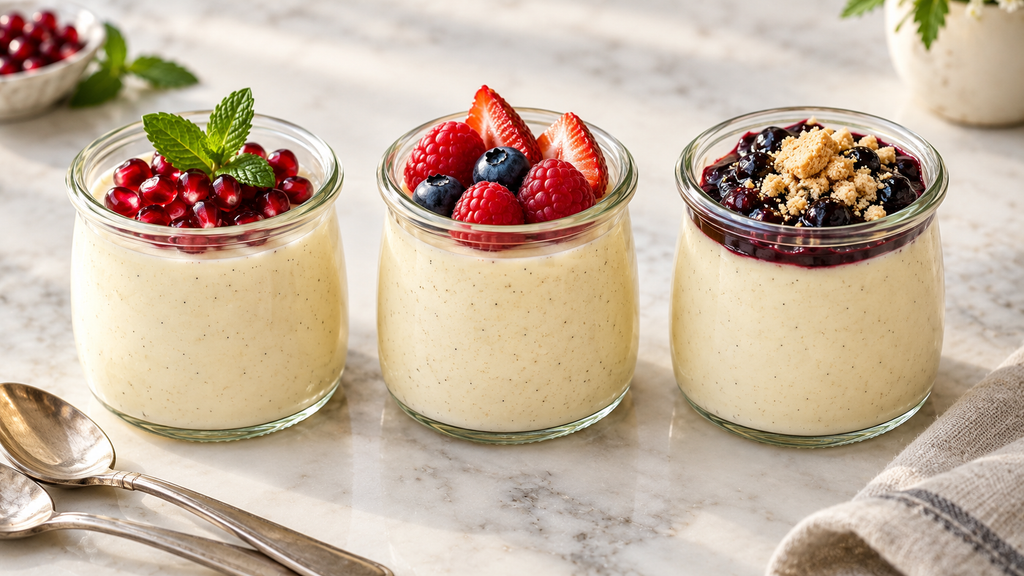
I serve panna cotta right in the jars. No flipping, no hot-water bath, no stress about it sliding off the plate in pieces.
Add toppings just before serving so they stay fresh and the juice doesn’t bleed into the cream. A few that work really well with vanilla:
- Pomegranate seeds and a mint leaf: about 1 tablespoon of seeds per jar. The red against the ivory cream is so pretty.
- Mixed berries: raspberries, blueberries, or sliced strawberries, roughly 2 tablespoons per jar.
- Quick berry sauce: simmer 1 cup frozen berries with 1 to 2 tablespoons sugar for about 8 minutes, until it’s jammy. Cool it completely before spooning on.
- A little crunch: crumble a gluten-free cookie over the top. Crisp cookies hold up better than soft ones.
Storage and make-ahead
This is a make-ahead dessert by nature. Covered tightly, the jars keep in the fridge for up to 3 days, so you can make them on a Friday for a Sunday dinner.
Keep the toppings separate until you serve. Berries and pomegranate get soft and leak juice if they sit on the cream overnight.
Can you freeze panna cotta? I don’t recommend it. Gelatin doesn’t love the freezer, and when it thaws the texture turns grainy and a little watery.
Vanilla bean panna cotta FAQ
Can I use vanilla extract instead of vanilla bean?
You can. Use 2 teaspoons of pure vanilla extract and stir it in after you take the pan off the heat. The flavor is a bit lighter and you won’t get the specks, but it still tastes lovely.
How long does panna cotta take to set?
Plan on at least 6 hours in the fridge. Overnight gives the best texture, and it keeps firming up a little until about the 12-hour mark.
What’s the difference between panna cotta and crème brûlée?
Panna cotta has no eggs and never goes in the oven. It’s sweet cream set with gelatin. Crème brûlée is a baked custard made with egg yolks, with a hard caramelized sugar top.
Can I turn panna cotta out onto a plate?
Yes. Lightly grease the ramekins with a neutral oil before filling. To unmold, dip each one in hot water for about 10 seconds, run a thin knife around the edge, and flip it onto a plate. Jars are easier, though, and they look just as nice.
Can I use agar agar instead of gelatin?
Agar works for a vegetarian version, but it behaves differently. It has to be boiled for a minute or two to activate, and it sets firmer and less creamy. I haven’t tested it with this recipe, so follow the package directions for the amount.
More gluten-free desserts to try
If you want a cookie on the side (or crumbled on top), my gluten free spritz cookies and the crisp cut-out version of my gluten free sugar cookies are both great with panna cotta. For another make-ahead dessert, try this easy gluten free cheesecake or the 4-layer gluten-free chocolate delight. You’ll find the rest in my gluten-free desserts collection.
If you make this vanilla bean panna cotta, I’d love to know how it went. Leave a star rating in the recipe card below, and tell me in the comments which topping you picked, or if you tried the chia version!
Recipe card: Vanilla Bean Panna Cotta
Silky vanilla cream set with gelatin in small jars, naturally gluten free and made a day ahead.
| Yield | Prep | Cook | Cool | Chill | Total |
|---|---|---|---|---|---|
| 7 servings (4 oz jars) | 5 min | 10 min | 15 min | 6 hours | 6 hours 30 min |
Course: Dessert · Cuisine: Italian · Diet: Gluten free
Ingredients
- 3 tablespoons cold water
- 1 packet (about 7 g / 2 1/4 teaspoons) unflavored powdered gelatin
- 2 cups (480 ml) heavy whipping cream
- 1 cup (240 ml) whole milk (or chia water, see notes)
- 1/2 cup (100 g) granulated sugar
- 2 teaspoons vanilla bean paste, or seeds from 1 vanilla bean
- Pinch of salt
For serving (optional): pomegranate seeds, fresh berries, fresh mint
Instructions
- Add the cold water to a small bowl. Sprinkle the gelatin evenly over the top and let it bloom for 5 minutes, until spongy.
- In a medium saucepan, combine the cream, milk, sugar, vanilla, and salt.
- Warm over medium heat, stirring now and then, until small bubbles form around the edges and the sugar is fully dissolved, about 5 to 7 minutes. Don’t let it boil hard.
- Remove the pan from the heat. Whisk in the bloomed gelatin for about 30 seconds, until completely melted with no lumps.
- Let the mixture cool for 15 to 20 minutes, stirring a few times, so the vanilla seeds don’t sink.
- Stir once more and pour into seven 4-ounce jars or ramekins (just under 1/2 cup each). Strain through a fine sieve first if you want it extra smooth.
- Chill for at least 6 hours or overnight, covering once cold. Add toppings right before serving.
Notes
- Chia swap: replace the milk with 1 cup of chia water made from ground chia seeds soaked in boiled water for 12 hours in the fridge. Strain it for a smoother texture. Still contains dairy from the cream.
- Vanilla extract: use 2 teaspoons pure extract, added after the pan comes off the heat.
- Storage: covered in the fridge for up to 3 days. Not recommended for freezing.
- Gluten-free check: read labels on vanilla paste and any cookie or crumble toppings.
- See the post for tips on unmolding and fixing panna cotta that won’t set.