
Table of Contents
Quick answer: For this gluten-free springerle cookie recipe, beat 4 eggs with 1 lb powdered sugar for 10 to 15 minutes, add anise and 500 g of a 1-to-1 gluten-free flour blend with xanthan gum, then chill the dough. Press it with a springerle mold dusted with cornstarch, dry the cookies uncovered for 12 to 24 hours, and bake at 300°F (150°C) for 12 to 15 minutes. The overnight drying keeps the design sharp and creates the puffed “foot.”
At a glance: Makes about 36 cookies · Total time about 1 day (mostly drying) · Key ingredients: eggs, powdered sugar, anise, gluten-free flour · No butter
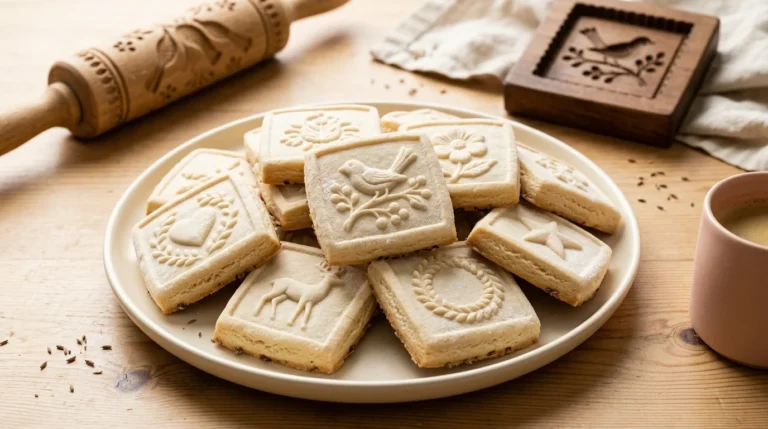
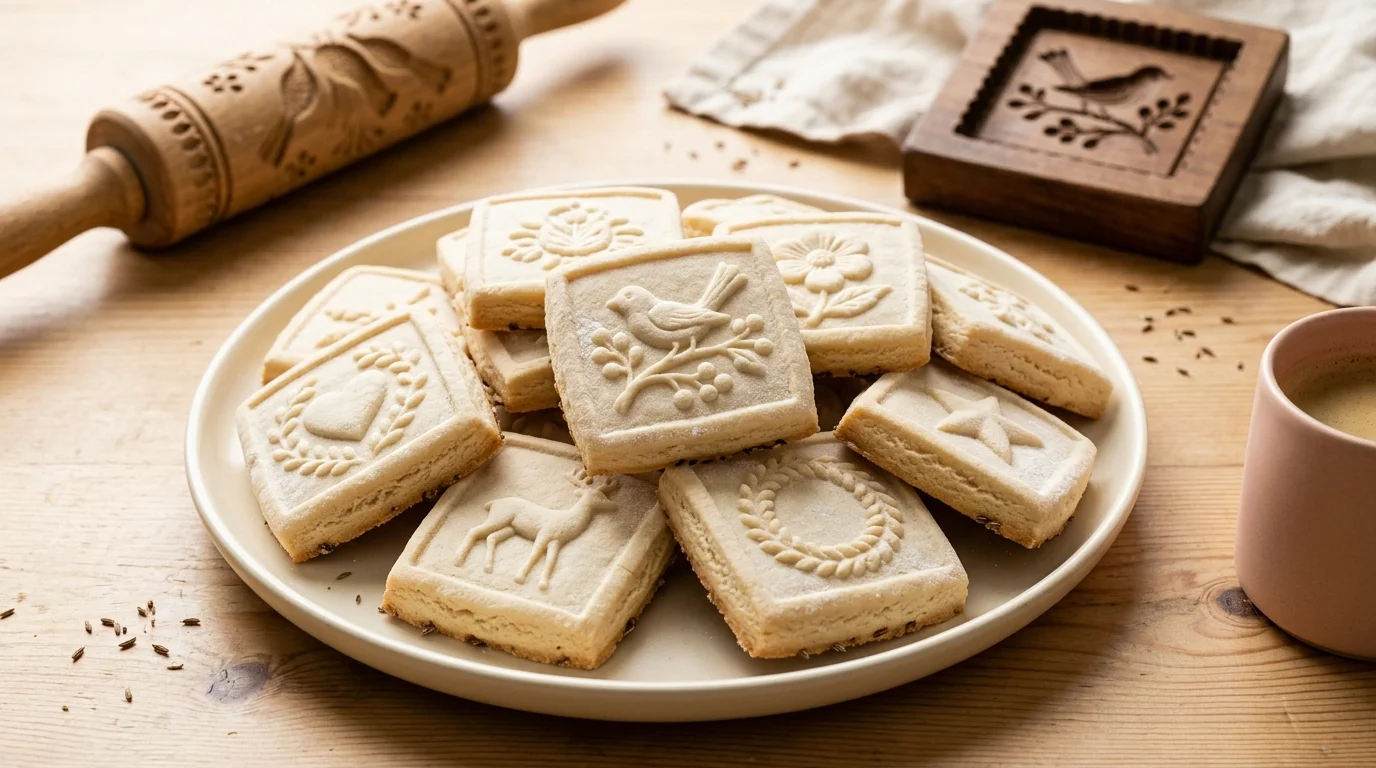
If there’s one cookie that makes people stop and stare at a holiday platter, it’s springerle. This springerle cookie recipe gives you the real thing: a pale, crisp top with a raised picture pressed into it, a soft anise-scented center, and the little puffed foot underneath. The only difference is that it’s completely gluten-free.
I’ll be honest. Springerle were the cookie I was most nervous to convert. A traditional springerle cookie recipe relies on wheat flour, and the whole point is a dough firm enough to hold every fine line of a carved mold. I expected gluten-free dough to crumble or blur. It didn’t. With the right flour blend, a proper chill, and an overnight dry, the designs came out just as sharp.
The ingredient list is short: eggs, powdered sugar, anise, and flour. What this recipe really asks for is time, so start the day before you want to bake. Below, I’ll walk you through each ingredient, what actually happens in your kitchen at every stage, and the mistakes I learned to avoid.
What Are Springerle Cookies?
Springerle are embossed anise cookies from southern Germany, mostly the Swabia region, and they’re also baked in Switzerland, Austria and Alsace. The tradition goes back at least to the 14th century. One of the oldest surviving molds from that era is kept at the Swiss National Museum in Zürich. Nobody knows exactly where the name comes from, though it’s usually translated as “little jumper” or “little knight.” You can read more on Wikipedia’s springerle page.
What I love most is that every family’s springerle cookie recipe was really a way to show off their molds. People carved scenes of animals, flowers, and holiday stories into wood, and the cookies became small edible pictures given as gifts.
What Makes This Springerle Cookie Recipe Different
Most cookies get their texture from butter. Springerle have none. Their structure comes from eggs and sugar beaten for a long time into a thick foam, which makes a firm, smooth dough that holds the carving of a mold.
This springerle cookie recipe keeps that traditional method and changes only the flour. In place of wheat, I use a 1-to-1 gluten-free blend with xanthan gum, and I dust with cornstarch instead of flour. The result looks and tastes like the classic cookie, and it’s safe for gluten-free guests.
Ingredients for This Springerle Cookie Recipe
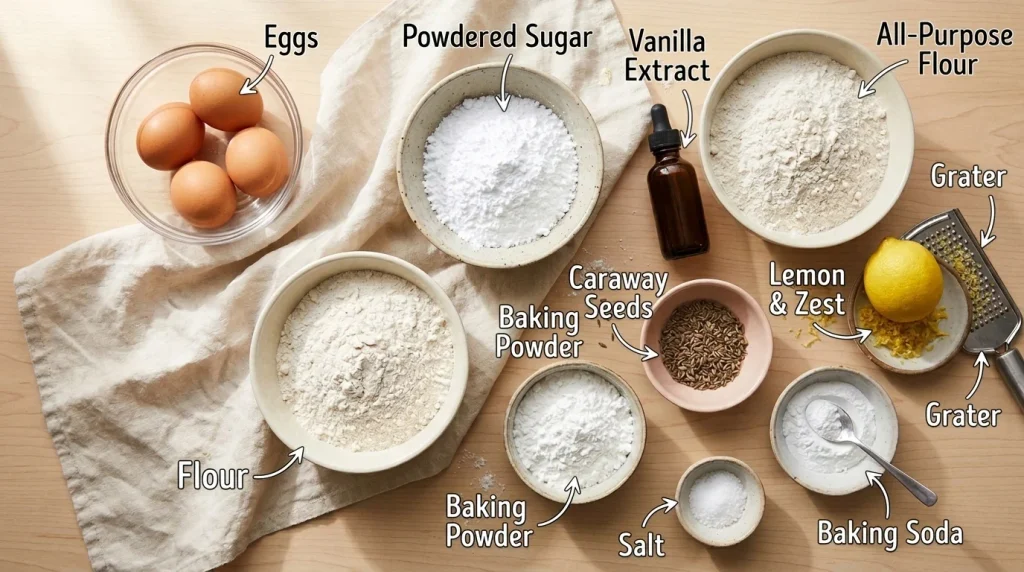
This springerle cookie recipe has only a handful of ingredients, so each one does a real job. Here’s what each one does and how to choose it.
Gluten-Free Flour Blend With Xanthan Gum
In wheat flour, gluten forms a stretchy network that holds dough together. Gluten-free flours don’t have it, so the dough can crack and crumble. Xanthan gum fills part of that gap. It’s a binder that absorbs water and forms a sticky gel, which helps the dough hold together and keep its shape in the oven. Researchers describe xanthan gum and similar hydrocolloids as the most common way to mimic gluten’s role in gluten-free baking.
For springerle, choose a 1-to-1 (or “measure for measure”) blend that already contains xanthan gum. These blends are usually a mix of rice flour and starches like potato or tapioca. Avoid blends heavy in bean flours, since their flavor can fight with the anise. Weigh the flour: 500 g is the target.
Eggs
The eggs are the backbone of the cookie. Use them at room temperature, because warm eggs whip faster and to a bigger volume than cold ones. That’s a basic rule of egg foams, covered in this egg foams guide from NC State Extension.
Powdered Sugar
Powdered sugar dissolves quickly into the eggs and gives the cookies their smooth, porcelain-like surface. Granulated sugar can leave the top slightly grainy. Most powdered sugar contains a little cornstarch to prevent clumping, so it’s normally gluten-free, but check the label if you bake for someone with celiac disease.
Anise
Anise is the classic springerle flavor: sweet and licorice-like. Anise oil is very concentrated, so ½ teaspoon is plenty. Anise extract is milder, so you need about 2 teaspoons. The whole anise seeds go under the cookies on the baking sheet, where they toast and perfume the bottoms.
Baking Powder or Baker’s Ammonia
Most of the lift comes from the beaten eggs, so you need only a small amount of leavening. Gluten-free baking powder is the easiest choice. For the most traditional texture, use baker’s ammonia, also called hartshorn because it was once made from deer antler. In the oven, it breaks down into ammonia, carbon dioxide and water vapor. You’ll smell ammonia while it bakes, but it escapes from thin, dry cookies like springerle and leaves no taste behind.
What Happens in Your Kitchen: The Science Behind Springerle
Understanding each stage makes this springerle cookie recipe much easier, because you’ll know what to look for instead of just watching the clock.
Beating: Building the Foam
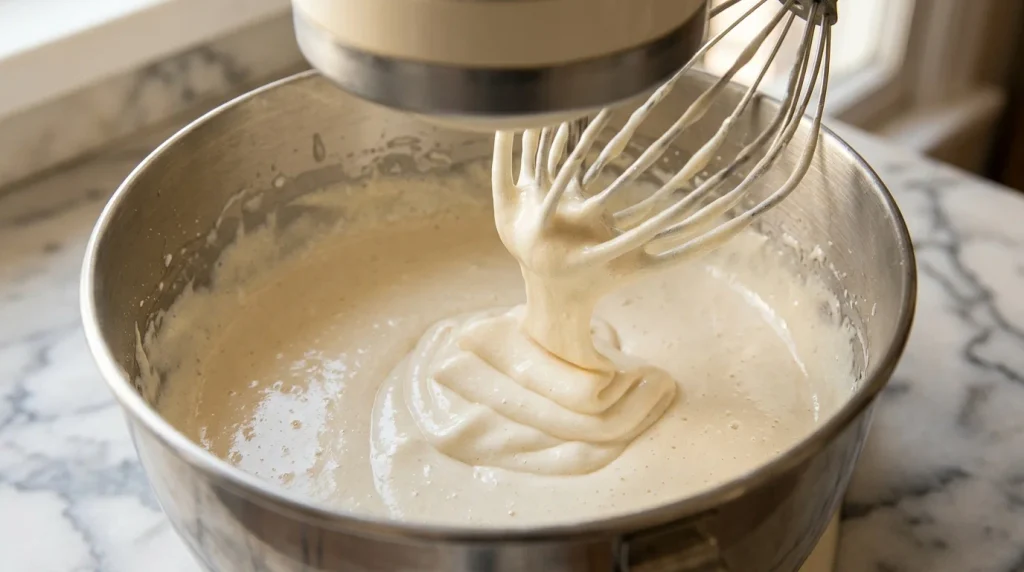
When you beat eggs and sugar for 10 to 15 minutes, you trap thousands of tiny air bubbles. The egg proteins unfold and wrap around each bubble, and the dissolved sugar makes that foam thicker and more stable. The mixture turns pale, nearly doubles in volume, and falls from the beaters in a slow ribbon. This foam gives springerle most of their lift.
Resting: Letting the Flour Hydrate
Gluten-free flours, especially rice flour, absorb liquid more slowly than wheat. During the 2-hour chill, the flour and xanthan gum soak up moisture, so the dough goes from slightly sticky to smooth and firm. Cold dough also releases more cleanly from the mold.
Drying: Forming the Skin
After you press and cut the cookies, they sit uncovered overnight. Moisture slowly evaporates from the top surface and leaves a thin, firm, slightly leathery skin. The inside stays soft. This contrast is what makes springerle work.
Baking: Why the Foot Forms
In a low oven, the air bubbles and leavening expand. The dry skin on top can’t stretch, so it holds the picture in place. The soft dough underneath has only one way to go, and that’s up from the bottom. That lift creates the foot, the puffed band around the base that tells you the cookie was dried and baked correctly.
How to Make This Springerle Cookie Recipe in 7 Steps
The full amounts are in the recipe card below. Here’s what to look for at each step, because with springerle the cues matter more than the clock.
1. Beat the eggs and sugar. This takes longer than you’d think. After 10 to 15 minutes the mixture should be pale and almost doubled, and it should fall from the beaters in a thick ribbon that sits on top for a second before sinking in. If it still looks runny, keep going.
2. Add the flour slowly. About a cup at a time, on low speed. The dough is ready when it’s stiff and smooth and pulls away from the sides of the bowl. Only add extra flour if it really sticks to your fingers.
3. Chill the dough. Two hours is the minimum, and overnight is fine. Cold dough holds the design better and lets go of the mold cleanly.
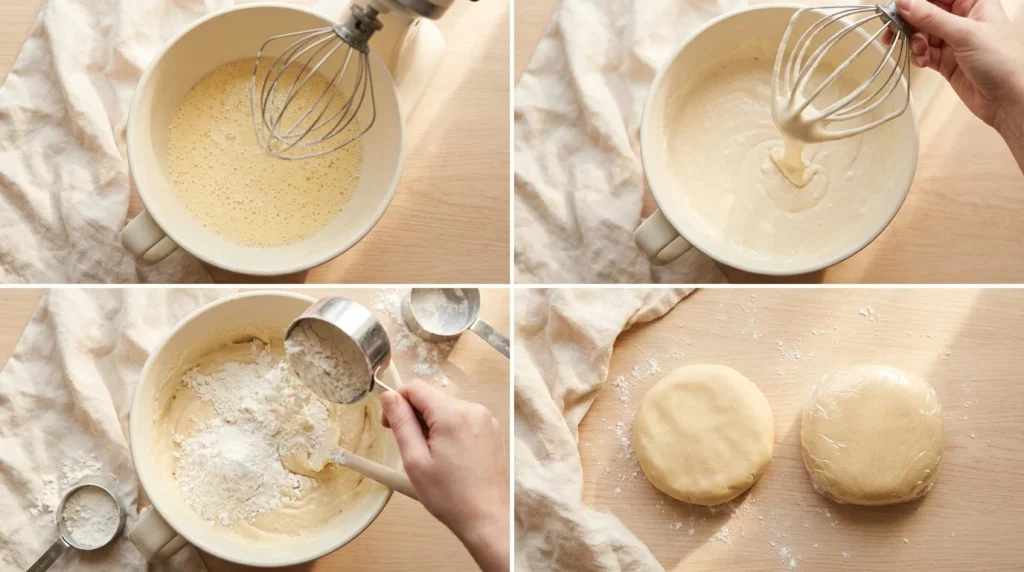
4. Press the designs. Roll the dough ¼ to ⅜ inch thick, dust the mold with cornstarch, and press straight down with even pressure. Then lift straight up. Don’t rock it!
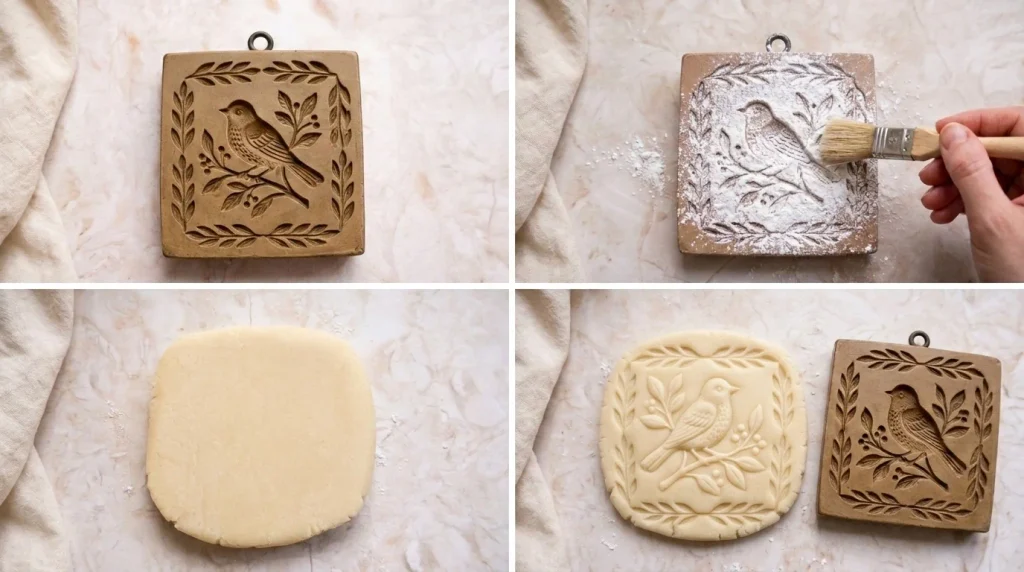
5. Cut and place the cookies. Trim around each picture and set the cookies on the anise seeds, about 1 inch apart.
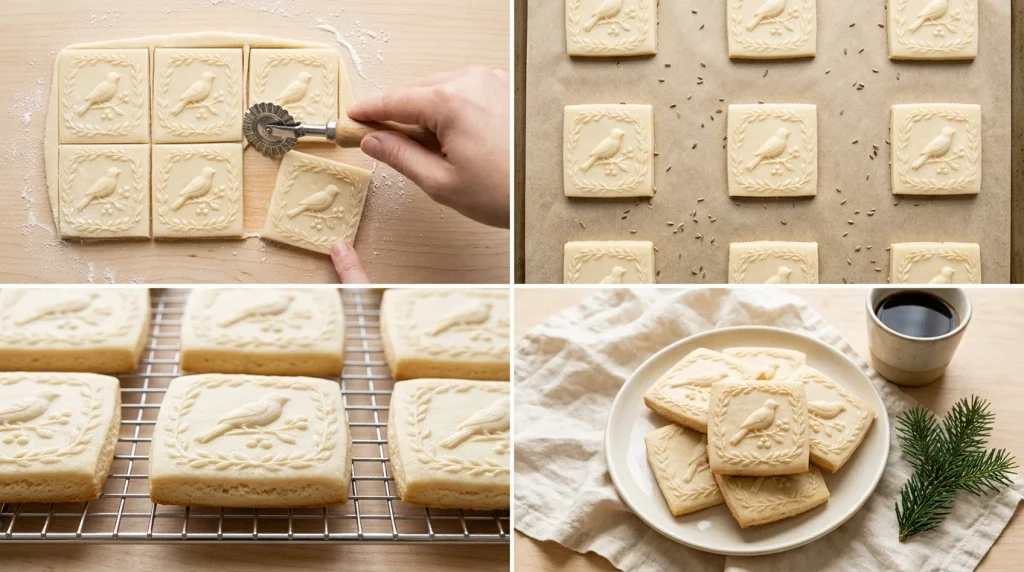
6. Let them dry. This is the step everyone wants to skip, and it’s the one that makes the foot. After 12 to 24 hours, the tops should feel dry and a little leathery. If a light touch leaves a fingerprint, give them more time. In a humid kitchen it can take up to 2 days.
7. Bake low and slow. Bake at 300°F (150°C) for 12 to 15 minutes. You want light golden bottoms, pale tops, and a puffed foot around the base. If the tops start to brown, your oven is running hot.
My Tips for Perfect Springerle Designs
Get the Dough Consistency Right
The dough should feel smooth and firm, barely tacky, and shouldn’t stick to your fingers. My quick test: press a thumb in. It should leave a clean print that doesn’t sag. If the dough sticks, chill it longer before you reach for more flour. Warm dough is the usual cause, and extra flour leads to cracks later.
Press the Mold the Right Way
Dust the mold lightly with cornstarch, then brush away the extra so it doesn’t fill the fine lines. Press straight down with firm, even pressure. Don’t rock the mold, or the edges will blur. Lift it straight up, and if it sticks, give the side of the mold a gentle tap.
Deep, cleanly carved molds give the clearest results. I roll the dough thicker (about ⅜ inch) for large, detailed molds and thinner (about ¼ inch) for small ones.
Keep It Truly Gluten-Free
If you’re baking for someone with celiac disease, the flour swap is only half the job.
- Dust with cornstarch or rice flour. Regular flour on the mold or counter would add gluten right back.
- Check your labels. Use baking powder, anise extract and powdered sugar labeled gluten-free. Clemson University explains what a gluten-free label actually means.
- Mind your wooden mold. Wood is porous, and the Celiac Center at BIDMC notes that wooden items can hold gluten. If your mold has been used with wheat flour, keep a separate one for gluten-free baking.
- Avoid cross-contact. Beyond Celiac’s cross-contact guide explains how to bake safely in a shared kitchen.
Bake Low and Slow
Springerle should be set, not toasted. I bake at 300°F (150°C) on the center rack and use a cool baking sheet for each batch. If your oven runs hot, stack two baking sheets together to protect the bottoms.
Springerle Cookie Recipe Troubleshooting
Even a reliable springerle cookie recipe can go wrong when the kitchen is warm or humid. Here are the problems I see most often, and how to fix them.
| Problem | Likely cause | Fix |
|---|---|---|
| Design is blurry or flat | Not dried long enough, or oven too hot | Dry until the tops feel leathery; bake at 300°F or lower |
| Dough sticks to the mold | Dough too warm, or mold not dusted | Chill the dough longer; dust the mold with cornstarch before every press |
| Cookies crack while drying or baking | Too much flour | Weigh the flour; add extra only 1 tablespoon at a time |
| Dough crumbles when rolled | Blend without xanthan gum, or dough too cold | Use a blend with xanthan gum; let cold dough sit 5 to 10 minutes before rolling |
| No foot forms | Tops not dry enough, or too little lift from beating | Dry longer; beat the eggs and sugar the full 10 to 15 minutes |
| Tops turn brown | Oven runs hot | Lower to 275°F (135°C) or put an empty sheet on the rack above |
| Rock-hard cookies | Normal on day one, or overbaked | Store airtight for a few days; pull them while the tops are still pale |
| Anise taste is too strong | Too much anise oil | Use extract next time, or start with fewer drops of oil |
How to Store and Serve Springerle
Let the cookies cool completely, then store them in an airtight tin in a cool, dry place, with parchment between the layers to protect the designs. They’re good to eat after 1 or 2 days, and many bakers say they taste best after 2 to 4 weeks. Stored well, they keep for several months, which makes this springerle cookie recipe perfect for baking ahead of the holidays.
If they’re still too hard for your taste, add a slice of apple on a piece of parchment to the tin for a day, without letting it touch the cookies. Then take it out.
Springerle make beautiful gifts. I like to tuck them into a holiday tin next to a few gluten-free sugar cookies and gluten-free spritz cookies, so there’s a mix of crisp, soft and buttery. Serve them with coffee or tea.
Flavor Variations
- Lemon: Use the full teaspoon of lemon zest. It brightens the anise.
- Vanilla: Replace half the anise with vanilla bean paste for a milder cookie that kids often prefer.
- Cardamom: Add a small pinch of ground cardamom. A little goes a long way.
Springerle cookie recipe FAQ
Is a traditional springerle cookie recipe gluten-free?
No. Traditional springerle are made with wheat flour, and the molds are usually dusted with flour too. This version uses a 1-to-1 gluten-free flour blend with xanthan gum and cornstarch for dusting, so it’s safe for a gluten-free diet.
Is springerle hard to make?
Not really. The steps are simple, but they take time. Your mixer does the hardest part, the 10 to 15 minutes of beating. After that it’s mostly waiting: 2 hours of chilling and a night of drying. Start the day before you need them and they’re an easy bake.
Can you make springerle without anise?
Yes. Anise is traditional, but lots of people don’t like the licorice flavor. Use 2 teaspoons of vanilla or lemon extract in its place, or 1 teaspoon of almond extract, which is stronger. If you go with lemon, add the full teaspoon of zest too. Then bake the cookies on plain parchment instead of anise seeds.
Can I use anise extract instead of anise oil?
Yes. Anise oil is about 4 times stronger, so use 2 teaspoons of extract in place of ½ teaspoon of oil.
Can I use a springerle rolling pin instead of a mold?
Yes, and it’s faster for a big batch. First roll the dough a little thicker than usual, about ⅜ to ½ inch, because the springerle pin presses it down. Dust the pin with cornstarch and roll it over the dough once, with firm, even pressure. Don’t go back over it, or the pictures will double. Cut along the lines between the designs. Deep cookie stamps work too, but shallow ones give a softer design.
What kind of springerle mold is best?
Deep, cleanly carved molds give the sharpest designs, whether they’re wood or resin. For gluten-free baking, resin is easier to keep safe because it isn’t porous and doesn’t hold flour the way wood can. If your wooden mold has been used with wheat flour, keep it for regular baking and use a separate one for gluten-free.
Are springerle supposed to be hard or soft?
Crisp on the outside and soft inside, once they’ve rested. Right out of the oven they’re hard, and that’s normal. Keep them in an airtight tin for a few days and the centers soften. For softer cookies, put a slice of apple on parchment in the tin for a day, then take it out.
Can I use baking soda instead of baker’s ammonia?
It’s better not to. Baking soda needs an acid to work and can leave a soapy taste, and this dough has almost no acid. Use gluten-free baking powder instead, which already contains its own acid.
More Gluten-Free Cookies to Bake
If you enjoyed this springerle cookie recipe, here are a few more from my kitchen:
- Gluten-Free Spritz Cookies: Another German holiday classic, buttery and piped into pretty shapes.
- Gluten-Free Sugar Cookies: Soft or cut-out, perfect for decorating with kids.
- Gluten-Free Peanut Butter Cookies: Soft, chewy, and ready the same day, with no drying required.
You’ll find every cookie on my gluten-free cookies page and more holiday ideas in my gluten-free desserts collection, or browse all my gluten-free dessert recipes in one place.
Springerle take patience, but they reward you with something truly special: a cookie that’s half history, half art, and now safe for everyone at the table. If you try this springerle cookie recipe, I’d love to hear how it turned out. Leave a comment below and tell me which mold you used.