
Table of Contents
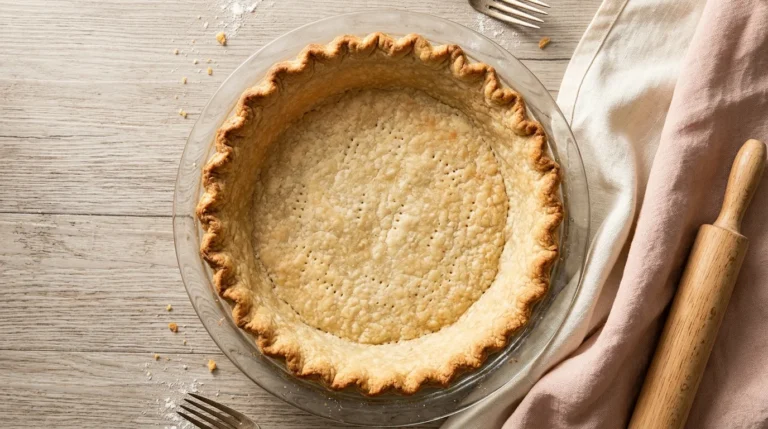
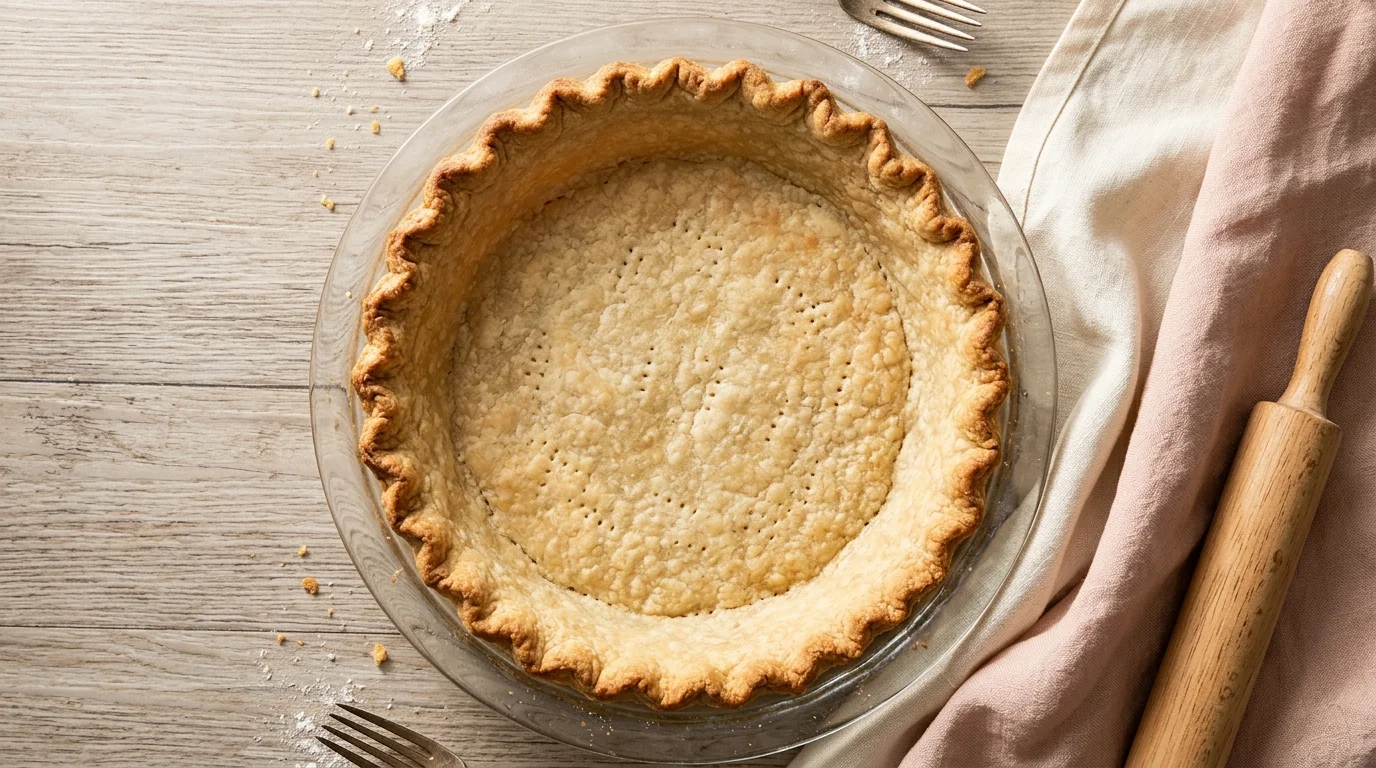
Pie season is here, and every good pie starts with the crust! This gluten free pie crust is buttery, flaky, and (the part I care about most) it rolls out in one piece instead of cracking into a puzzle. It’s made with a 1:1 gluten-free flour blend, cold butter, one egg and ice water.
My kid and I both have a gluten sensitivity, so everything I bake at home is gluten-free, and I share what works for us here. With Thanksgiving coming, pie crust was next on my list. My first one went into an apple pie, and I left it in the oven way too long, so the crust came out hard. Still, my son said it was delicious, and he told me his tummy didn’t make any noises afterward. I’ll take that!
The recipe makes two crusts. That’s enough for one double-crust pie, like apple, or two open pies like pumpkin and pecan. And the dough freezes really well, so you can make it this week and bake on Thanksgiving morning.
Why does gluten-free pie dough crack?
Because there’s no gluten to hold it together. In regular pie dough, wheat flour forms stretchy strands when it gets wet, so the dough bends when you lift it. Gluten-free flour doesn’t do that. Roll it out cold and dry and it breaks at the edges the second you try to move it.
This recipe fixes that in three small ways.
The egg adds protein and a bit of fat, which glues the dough together and makes it more forgiving. Xanthan gum (already in most 1:1 blends) gives the dough a little stretch. And the dough is mixed slightly wetter than a wheat pie dough. It should feel soft and tacky, a bit like play dough, not dry and sandy.
The last piece is time. Rice flour soaks up water slowly, so a dough that feels sticky right after mixing firms up nicely after an hour in the fridge. Skip the rest and you’ll get a crust that tastes a little gritty and falls apart when you roll it.
I also roll the dough between two sheets of parchment paper. That one habit fixes most of the tearing problems on its own, because you never have to lift the bare dough.
Gluten free pie crust ingredients
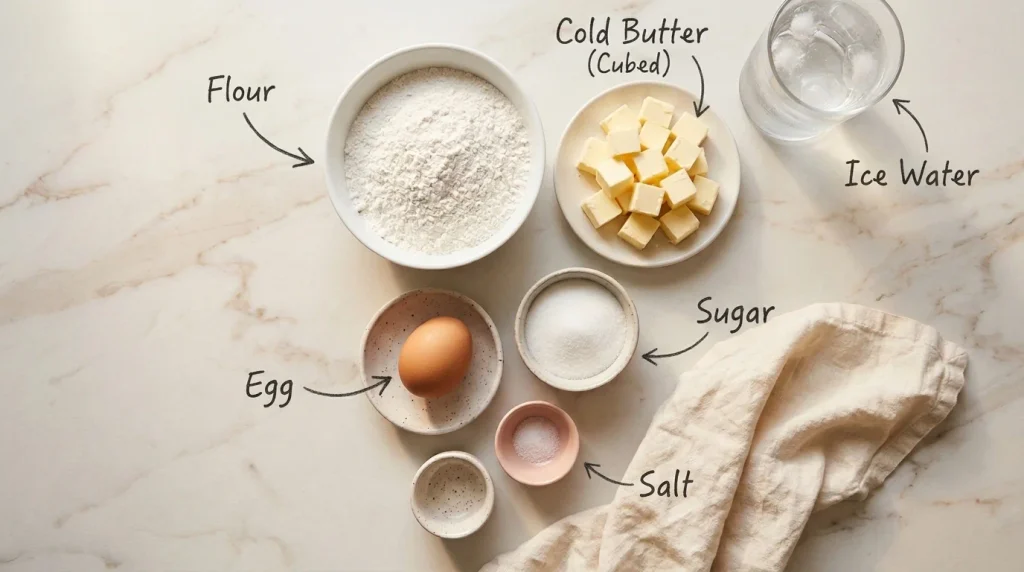
- Gluten-free 1:1 flour blend: Use a cup-for-cup blend made mostly of rice flour and starches, with xanthan gum already in it. Bob’s Red Mill 1-to-1 is one that has it. Blends don’t weigh the same per cup (2 1/2 cups can be anywhere from about 325 to 360 grams, depending on the brand), so weighing is the most reliable way. Use 350 grams. If you use cups, spoon the flour in and level it off. Scooping straight from the bag packs in too much, and the dough turns dry.
- Xanthan gum: Only if your blend doesn’t have any. Check the label! If your blend has it but the dough still cracks a lot, an extra 1/4 teaspoon makes it a little stretchier.
- Butter: Unsalted and very cold, cut into 1/2-inch cubes. I put the cubes in the freezer for 10 minutes while I measure everything else. Cold butter stays in little pieces, and those pieces turn to steam in the oven. That’s where the flaky layers come from.
- Egg: One large egg, straight from the fridge.
- Sugar: Just 1 tablespoon. It helps the crust brown. Leave it out for savory pies.
- Salt: Fine salt, so it spreads evenly.
- Ice water: Measure it from a glass of water with ice in it, not from the tap. You’ll need 4 to 6 tablespoons, depending on your flour.
For most of my baking I use my own toasted oat flour (it’s what’s in my gluten free brownies). But a pie crust has to roll thin and hold together, so here I use Bob’s Red Mill 1-to-1. It’s mostly rice flour, it already has xanthan gum in it, and it’s easy to find.
How to make gluten free pie crust
You can do this by hand with a pastry cutter or in a food processor. The processor is faster and keeps the butter colder, because your warm hands never touch it. A stand mixer with the paddle works too. Keep it on low and stop as soon as the dough clumps.
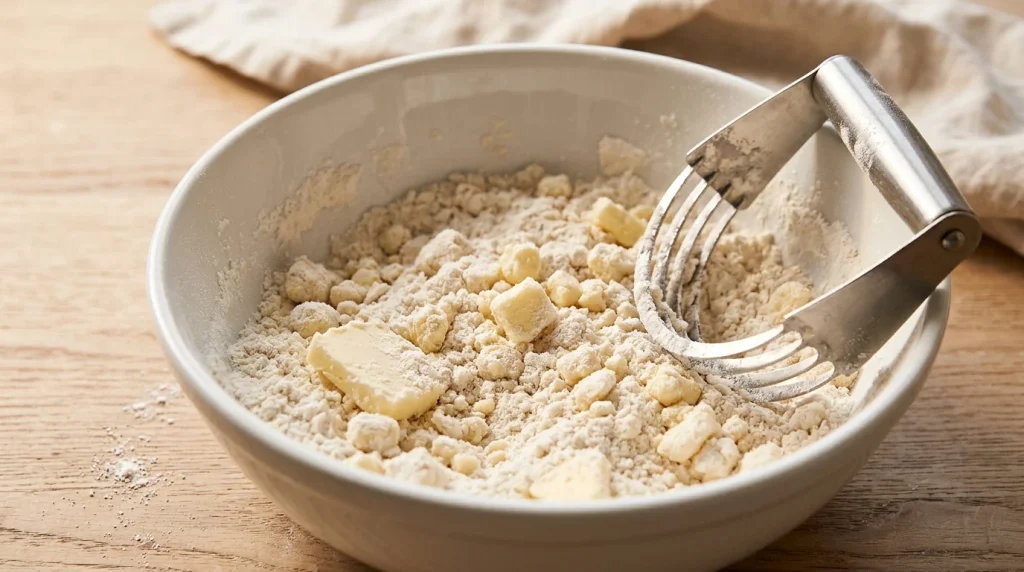
First, whisk the flour, sugar and salt together. Add the cold butter and cut it in (or pulse 8 to 10 times) until the mix looks like coarse crumbs with some butter pieces the size of peas and a few flat ones the size of almonds. Don’t go further than that. Those bigger pieces are your flakes. If you’re working by hand, press a few of the biggest pieces flat between your thumb and finger. Flat pieces of butter spread into wide, thin layers in the oven, and that’s what makes the crust flaky.
In a small cup, beat the egg with 4 tablespoons of the ice water. Pour it over the flour mix and stir with a fork until it starts to clump. Now squeeze a handful. If it holds together, it’s ready. If it crumbles, add more water 1 tablespoon at a time. Remember, gluten-free dough should feel a little tacky, so it’s better to stop slightly wet than slightly dry.
Tip the dough onto the counter, press it together and cut it in half. Shape each half into a flat disk about 1 inch thick. Flat disks chill faster and roll out rounder than balls do. Wrap them and refrigerate for at least 1 hour.
Want extra flaky layers? Try one quick fold. Before you shape the disks, press all the dough into a rough rectangle, fold it in thirds like a letter, then cut it in half. It takes 30 seconds and stacks the butter into thin sheets.
How to roll out gluten free pie crust
Take one disk out of the fridge and let it sit for 5 to 10 minutes. Straight from the fridge it’s too firm and the edges will split. It’s ready when you can press a dent into it with your finger without it cracking.
Put the disk between two sheets of parchment paper dusted lightly with gluten-free flour or tapioca starch. Roll from the center out, turning the parchment a quarter turn every few rolls, until you have a 12-inch circle about 1/8 inch thick. Small cracks at the edge? Just pinch them closed and keep going.
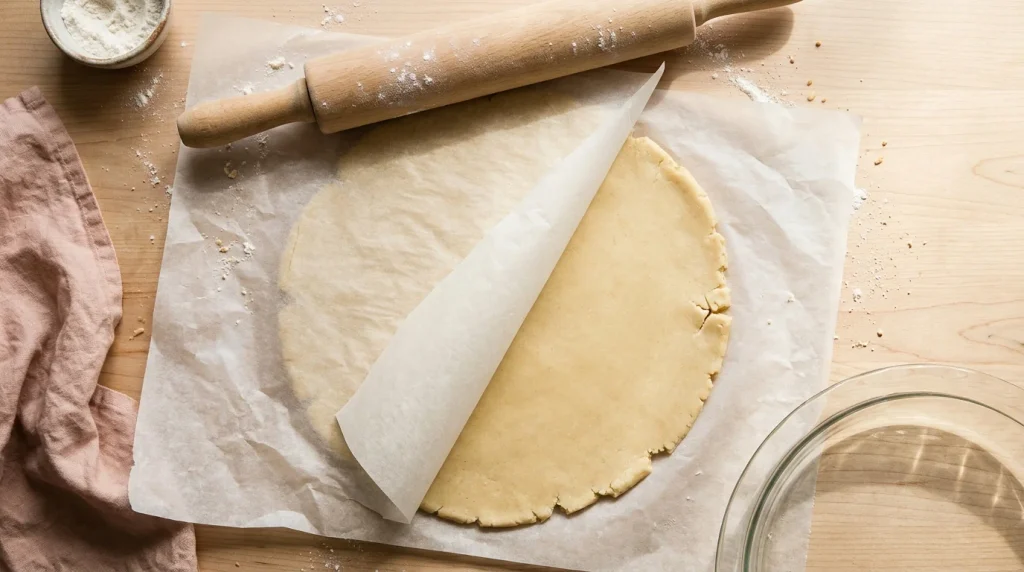
Peel off the top sheet. Flip the dough over the pie plate, parchment side up, then peel off the second sheet. Ease the dough down into the corners instead of stretching it, because stretched dough shrinks back in the oven. If it tears, press the edges back together or patch the spot with a scrap. Nobody will see it once it’s filled.
Nervous about flipping the dough? Do it the other way around. Lightly grease the pie plate, set it upside down on top of the rolled dough, slide one hand under the bottom parchment and flip everything over together. Then peel off the parchment and settle the dough into the plate.
Trim the edge so about 3/4 inch hangs over the rim. Fold that overhang under itself and crimp it with your fingers or press it with a fork. Then chill the shaped crust for 30 minutes (or 15 in the freezer) before it goes in the oven.
For a double-crust pie, roll the second disk the same way, lay it over the filling, then trim, fold and crimp both layers together. Cut 4 or 5 slits in the top so steam can escape.
Making a lattice? Cut the strips while the dough is still on the parchment and chill them for 10 minutes first. Cold strips lift without breaking. If one snaps anyway, piece it together under a crossing strip.
How to blind bake gluten free pie crust for pumpkin pie and quiche
Blind baking means baking the crust before the filling goes in. If you’re making a gluten free pie crust for pumpkin pie, custard or pecan pie, you need it so the bottom doesn’t turn soggy. Apple and other fruit pies baked in a double crust don’t need it.
Heat the oven to 400°F (200°C) with a rack in the lower third. Line the chilled crust with parchment and fill it to the top with pie weights, dried beans or plain sugar. The weights keep the sides from sliding down and the bottom from puffing up.
Bake for 20 minutes, until the edges look dry and pale golden. Lift out the parchment and weights, prick the bottom a few times with a fork, then:
- For a partly baked crust (pumpkin, pecan, quiche): bake 8 to 10 minutes more, until the bottom looks dry.
- For a fully baked crust (cream pies, no-bake fillings): bake 12 to 15 minutes more, until it’s golden all over.
One extra step I like for custard pies: brush the hot crust with a little beaten egg white and put it back in the oven for 2 minutes. It seals the bottom so the filling can’t soak in.
If the edges brown before the bottom is done, cover them with strips of foil or a pie shield.
Which pies can you make with gluten free pie crust?
This gluten free pie crust works for almost any pie, from apple and pumpkin to quiche. The only things that change are the sugar and whether you bake the crust first. Here’s how I’d use it:
| Pie | Crust | Bake the crust first? | Tip |
|---|---|---|---|
| Apple or other fruit pie | Double crust or lattice | No | Brush the top with beaten egg for a golden finish and cut steam vents. |
| Pumpkin pie | Single crust | Partly (8 to 10 extra minutes) | Seal the hot crust with egg white so the filling doesn’t soak in. |
| Pecan pie | Single crust | Partly | Cover the edges with foil if they brown before the filling sets. |
| Quiche | Single crust, no sugar | Partly | Seal with egg white. Quiche filling is very wet. |
| Chicken pot pie | Top crust only, or double crust, no sugar | Partly, if using a bottom crust | Let the filling cool a bit before adding the top crust. |
| Cream or no-bake pie | Single crust | Fully (12 to 15 extra minutes) | Let the crust cool completely before filling. |
Tips for a gluten free pie crust that doesn’t crack, shrink or go soggy
The dough cracks every time I roll it. It’s either too cold or too dry. Let it sit on the counter for another 5 minutes. If it still cracks, sprinkle on 1 teaspoon of water, knead it in briefly and press it back into a disk.
The dough sticks to everything. The butter has gone soft. Slide the whole thing, parchment and all, onto a baking sheet and chill it for 15 minutes. Then try again.
My crust shrank down the sides. That usually means it was stretched to fit the pan or didn’t chill after shaping. Ease the dough in loosely, leave a 3/4-inch overhang, and give it those 30 minutes in the fridge. Pie weights filled right to the top help too.
The bottom is pale and soggy. Bake on the lower rack, where the heat is stronger. A glass pie plate is handy here because you can lift it and check the bottom. For wet fillings, blind bake first.
The crust tastes gritty. The dough didn’t rest long enough, so the rice flour never fully softened. Give it the full hour (overnight is even better). A blend made with finely ground rice flour helps too.
It baked up hard instead of flaky. Too much extra flour got rolled in, or the butter was worked in too far. Dust the parchment lightly and stop cutting in the butter while you can still see pea-sized pieces. Overbaking does it too, and that’s exactly what happened to my first crust. I left the apple pie in too long and the crust turned hard. Take it out when the crust is golden, not deep brown, and cover the edges with foil as soon as they have good color.
And if your crust comes out a little cracked or uneven anyway? That’s okay. It’s pie! A scoop of ice cream covers a lot.
Dairy free, egg free and vegan gluten free pie crust
To make a gluten free dairy free pie crust, swap the butter for the same amount of firm vegan butter sticks, not the soft kind from a tub. Vegan butter melts faster, so freeze the cubes for 15 minutes and chill the shaped crust a little longer. For a dough that holds up better, use half vegan butter sticks and half cold vegetable shortening. Shortening has almost no water, so the crust stays tender and easier to handle.
Egg free: Leave out the egg and use 1 tablespoon of ground flaxseed mixed with 3 tablespoons of water instead. Let it sit for 5 minutes until it turns gel-like. The dough will be a bit more fragile, so keep it between the parchment sheets the whole time. If you can have dairy, 1/4 cup (60 g) of cold sour cream or plain Greek yogurt in place of the egg is another option. It makes a tender, slightly tangy dough. Start there and add ice water only if the dough is still dry.
Vegan: use the vegan butter and the flax egg together, and you have a gluten free vegan pie crust. Keep it extra cold, since it’s the most delicate version.
Shortening: You can replace up to half the butter with cold vegetable shortening. The crust gets a little more tender and holds its shape well, but it tastes less buttery.
Almond flour: I don’t recommend swapping it in here. Almond flour has no starch, so the crust turns crumbly and too soft to roll. It needs a different recipe.
Oat flour: I love baking with oat flour, but it can’t replace the blend completely here. It has no starch or binder, so the dough cracks when you roll it and bakes up more like a cookie than a flaky crust. Save your oat flour for crumb toppings and press-in crusts, where a crumbly texture is a good thing.
One crust only: Make the full batch and freeze the second disk. Halving the recipe means splitting an egg, and a whole disk in the freezer is handy anyway.
How to make ahead and freeze gluten free pie crust
This is a great dough to make early. Wrapped disks keep in the fridge for up to 2 days.
To freeze, wrap each disk tightly in plastic wrap, then put both in a freezer bag. They keep for up to 3 months. Thaw them overnight in the fridge, not on the counter, so the butter stays cold.
You can also freeze the crust already shaped in a metal or freezer-safe pie plate. Wrap it well and bake it straight from frozen, adding 3 to 5 minutes to the blind-baking time. (Don’t put a cold glass plate into a hot oven, though. A sudden temperature change can crack it.)
A blind-baked shell keeps at room temperature, loosely covered, for 1 day. Fill it the next day.
Short on time? Where to buy gluten free pie crust
Some weeks there’s just no time to make dough, and that’s okay. You’ll find two kinds of store-bought gluten-free crust:
- Frozen pie shells, already shaped in a foil pan. Wholly Gluten Free is one brand that makes them. Look in the freezer aisle near the regular pie crusts.
- Dry pie crust mixes, where you add the butter and water yourself. King Arthur and Bob’s Red Mill both make gluten-free pie crust mixes. Look in the baking aisle or order online.
Which store carries them changes a lot by location and season, and many stores only stock them around the holidays. Check your store’s app before you drive over. And if you’re very sensitive, look for a certified gluten-free label, not just “made without gluten”.
I haven’t tested store-bought crusts against this homemade gluten free pie crust yet, so I can’t tell you how they compare. If I try one, I’ll update this section.
Gluten free pie crust FAQ
Is regular pie crust gluten free?
No. Classic pie crust is made with wheat flour, and so are most store-bought crusts. Some brands sell gluten-free crusts in the freezer section, but you’ll need to check the label for a gluten-free claim. In the US, a food labeled gluten-free has to contain less than 20 parts per million of gluten, according to the FDA’s gluten-free labeling rule.
Do I need xanthan gum?
Yes, in some form. If your flour blend already has it, you’re set. If it doesn’t, add 1 teaspoon. Without it, the dough breaks apart as soon as you try to lift it.
Can I use this crust for savory pies?
Absolutely. Leave out the sugar and it makes a great gluten free pie crust for quiche, chicken pot pie or hand pies.
Why did my crust come out pale?
Gluten-free flour browns more slowly than wheat. Brush the edges with a little beaten egg before baking and bake on the lower rack. A pale crust is usually underbaked, so give it a few more minutes.
Can I press the dough into the pan instead of rolling it?
Yes. If rolling stresses you out, press small pieces of dough into the plate and up the sides until it’s an even 1/8 inch thick. It won’t be quite as flaky, but it bakes up nicely for single-crust pies.
Does gluten-free pie crust taste like regular pie crust?
Close, but not exactly the same. It’s buttery and flaky, and it’s a little more tender and crumbly than a wheat crust. A gritty or dry crust usually means the dough didn’t rest long enough or the flour blend is coarse, not that gluten-free crust has to taste that way. My son’s verdict on my first one: delicious.
How do I keep it truly gluten-free at home?
My kitchen is completely gluten-free, so I don’t have to think about this at home. If yours is shared, the flour is only half of it. If anyone in your home bakes with wheat flour, use clean bowls, a clean rolling pin (wooden ones can hold flour in the cracks) and fresh parchment. Check that your butter isn’t the one people dip toast knives into. Use a flour blend labeled gluten-free, and if anyone in your house has celiac disease, look for one that’s certified. The celiac center at the Children’s Hospital of Philadelphia has simple tips for preventing cross-contamination in a shared kitchen.
More gluten-free bakes to try
If you’d like apples without rolling any dough, my apple crisp with oatmeal is the easy way to go. For flaky pastry with even more layers, try my gluten free puff pastry. And if you like a buttery crust, the shortbread base in my gluten free lemon bars is a good one to know. You’ll find the rest in my gluten-free desserts.
[ADD: link to the Granny Smith apple pie once it’s live]
If you make this crust, I’d love to know what pie you filled it with. Leave a rating in the recipe card, and tell me in the comments which flour blend you used.
Recipe card: Easy homemade gluten free pie crust Recipe
A flaky, all-butter gluten-free crust that rolls out in one piece and works for sweet or savory pies.